In Invytly, a project is the home of one occasion: your wedding, a gala, a company retreat. It holds the guest list, the survey questions, the invitations you send, and the responses you collect. Everything starts by creating one.
Were you invited to collaborate on an existing project? Then you don't need to create anything: just open the invite link you received, and you'll land directly in the project. This guide is for creating a brand new project of your own.
Open the project form
- If you've just signed up, the "Create a new project" form opens by itself the first time you log in. You can't miss it.
- If you already have a project and want another one, click the project name at the top of the sidebar and select New project at the bottom of the list.
Fill in the details
The form asks for a few things. Here's what each field means:
- Name. What you'll see everywhere in the app, between 3 and 50 characters. "Giulia & Marco", "Company Retreat 2027", anything that tells you at a glance which event this is.
- Slug. The short identifier that appears in your public RSVP link (for example
invytly.com/rsvp/giulia-and-marco). Invytly generates it automatically from the name as you type, using only lowercase letters, numbers, and hyphens. Choose it carefully: the slug can't be changed after the project is created. It's the one field worth pausing on, because your guests will see it in the link you send them. - Description (optional). A short note about the project, up to 300 characters.
- Start date and end date (optional). The dates of your event. The end date can't come before the start date.
- Language. The language of your project: Italian, English, or French.
- Number of guests. How many guests you plan to invite. This sets your project's guest limit and, together with the plan, determines the total price. You can start from a realistic estimate; if you're unsure, count generously enough to cover plus ones.
- Plan. Pick one of the three plans (see below).
- Consent checkbox. Confirm that you're entitled to use your guests' contact details for event communications. The Learn more link explains exactly what this covers.
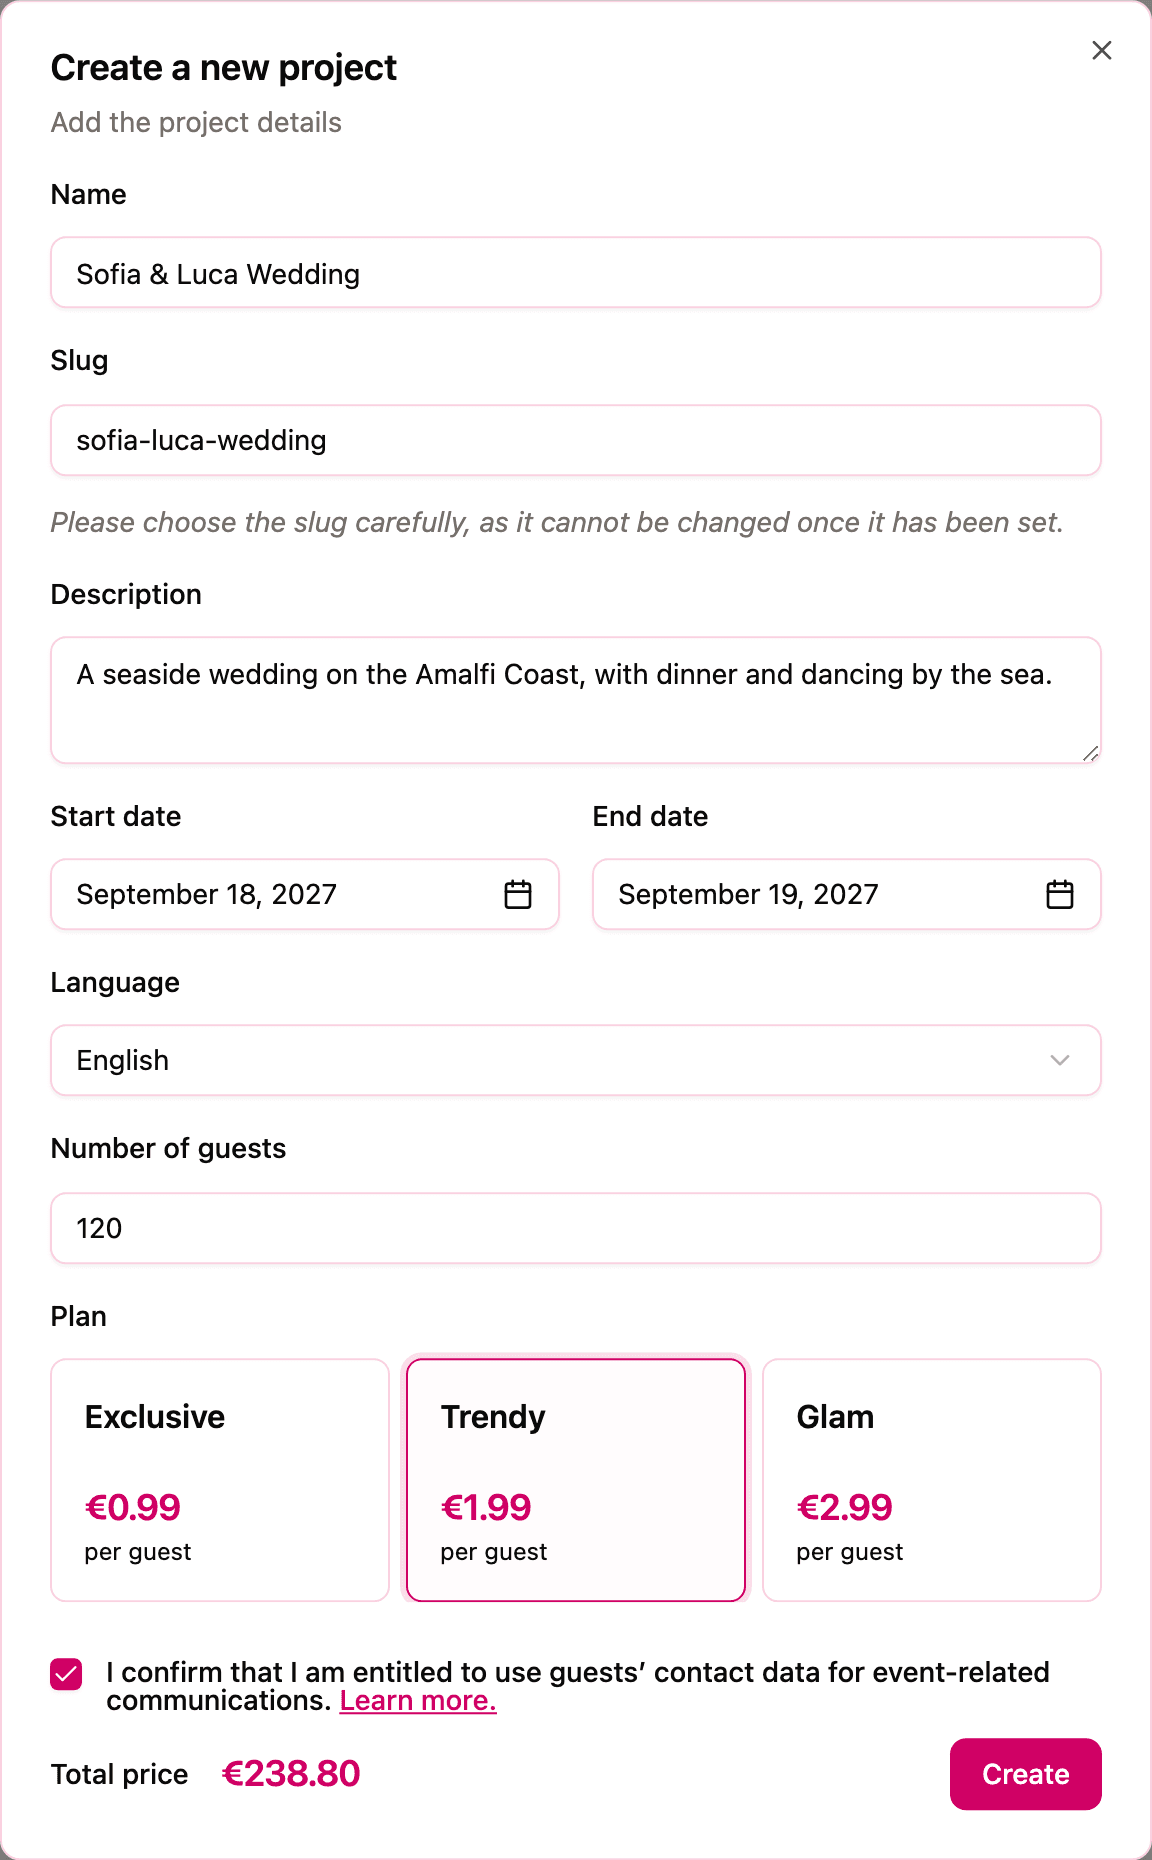
At the bottom of the form, Total price updates live: it's the plan's per-guest price multiplied by the number of guests you entered.
When everything looks right, click Create.
Choosing a plan
All plans are priced per guest:
| Plan | Price per guest |
|---|---|
| Exclusive | 0.99 € |
| Trendy | 1.99 € |
| Glam | 2.99 € |
The main difference between plans is how you can reach your guests: email campaigns are available starting from the Trendy plan, and WhatsApp messaging is included with Glam. If you plan to invite and remind guests directly through Invytly, pick your plan with that in mind.
What happens after you click Create
Your project is created right away, but it starts in a pending state: you'll see a "Your project is almost ready" screen instead of the dashboard. Activation is handled by the Invytly team and completes within 24 hours of payment confirmation. While you wait, the screen links to our guide on preparing a great guest list, so the time isn't wasted.
Once the project is active, the dashboard greets you with a short Set up your project checklist with the two steps that bring your project to life:
- Add your guests: import your list from a CSV file or add guests one by one.
- Add your questions: build the survey your guests will answer when they RSVP.
Complete both and the checklist gives way to your real dashboard, with live numbers about your event. To learn what all those numbers mean, continue with A tour of the dashboard.