Every Invytly project comes with its own RSVP page: a public page at app.invytly.com/rsvp/<slug> where your guests confirm their attendance. It's live as soon as the project exists, and it's the same page whether guests open the link directly or see it inside your wedding website (see Connecting the RSVP to your wedding website).
This article explains what guests see on that page, where each piece comes from, and how to give it the look of your event.
What your guests see
The guest journey has four steps:
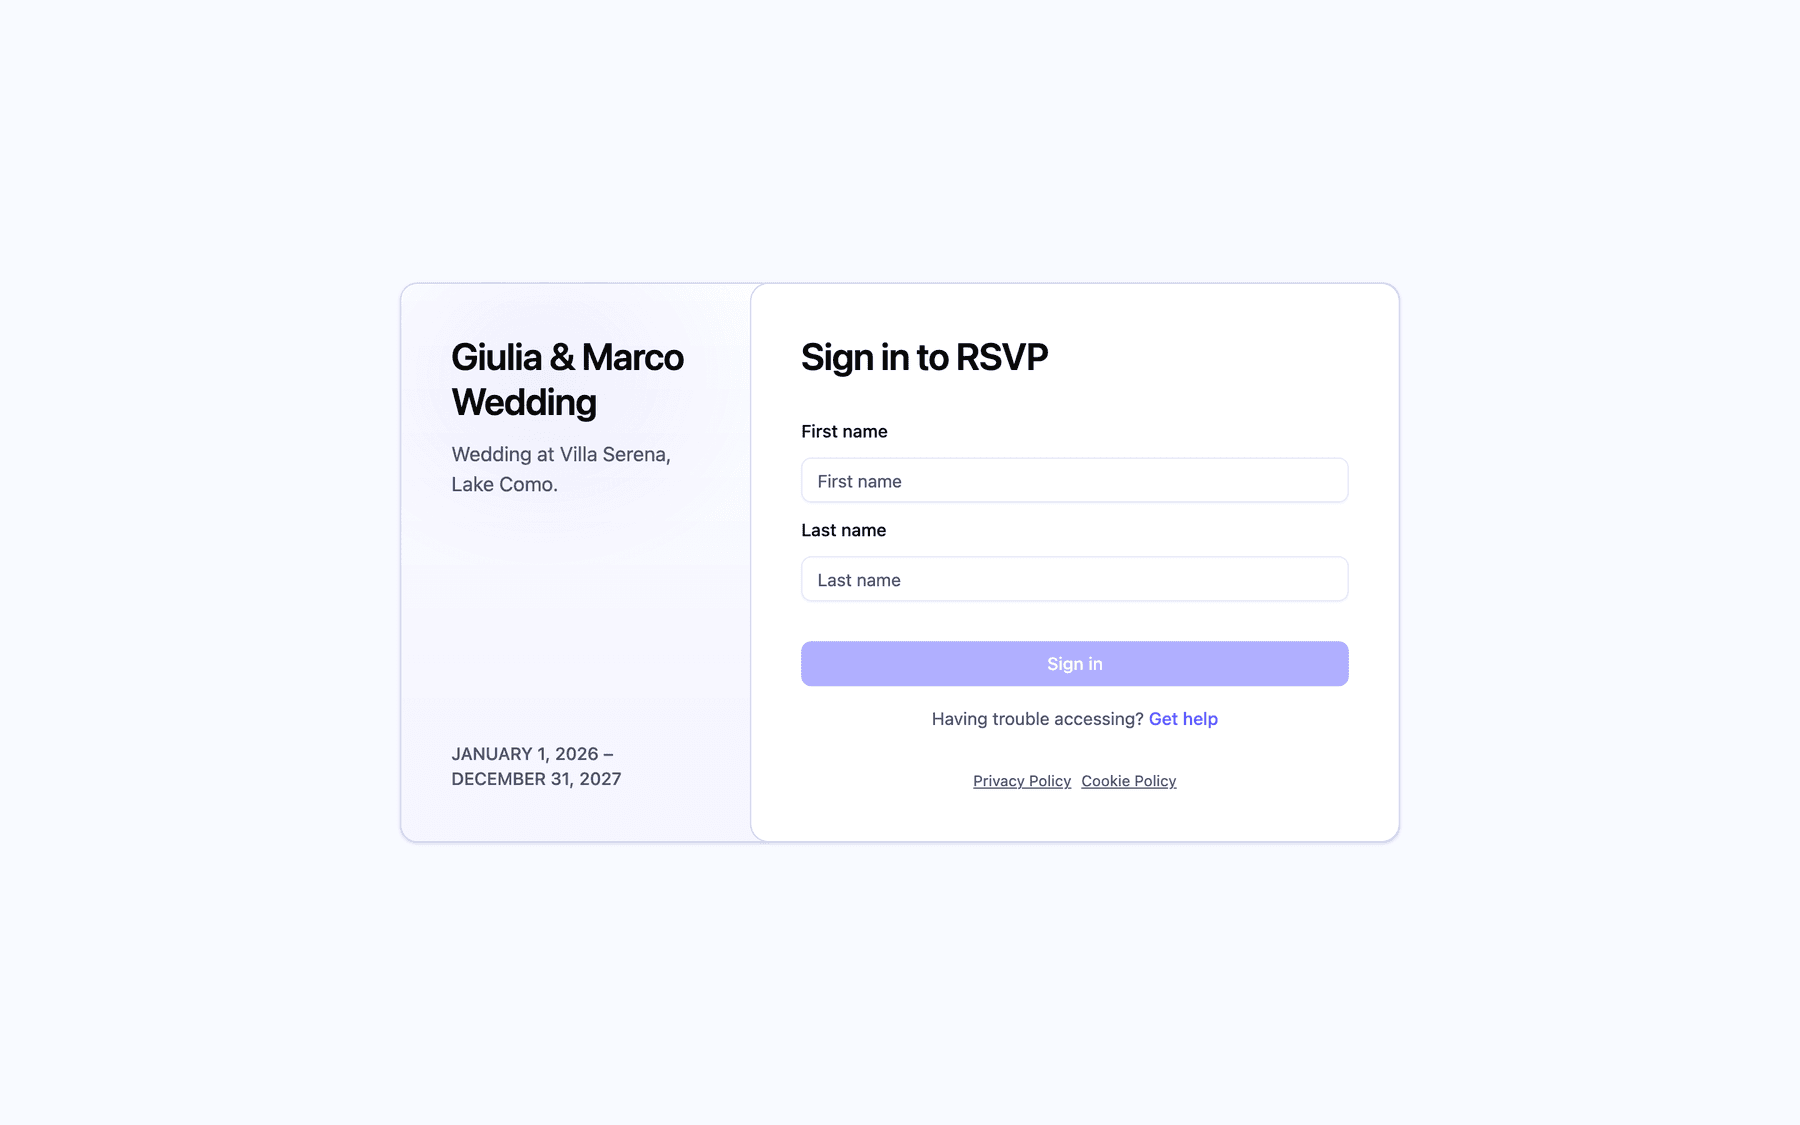
- Sign in. Guests type their First name and Last name and click Sign in. No codes, no passwords.
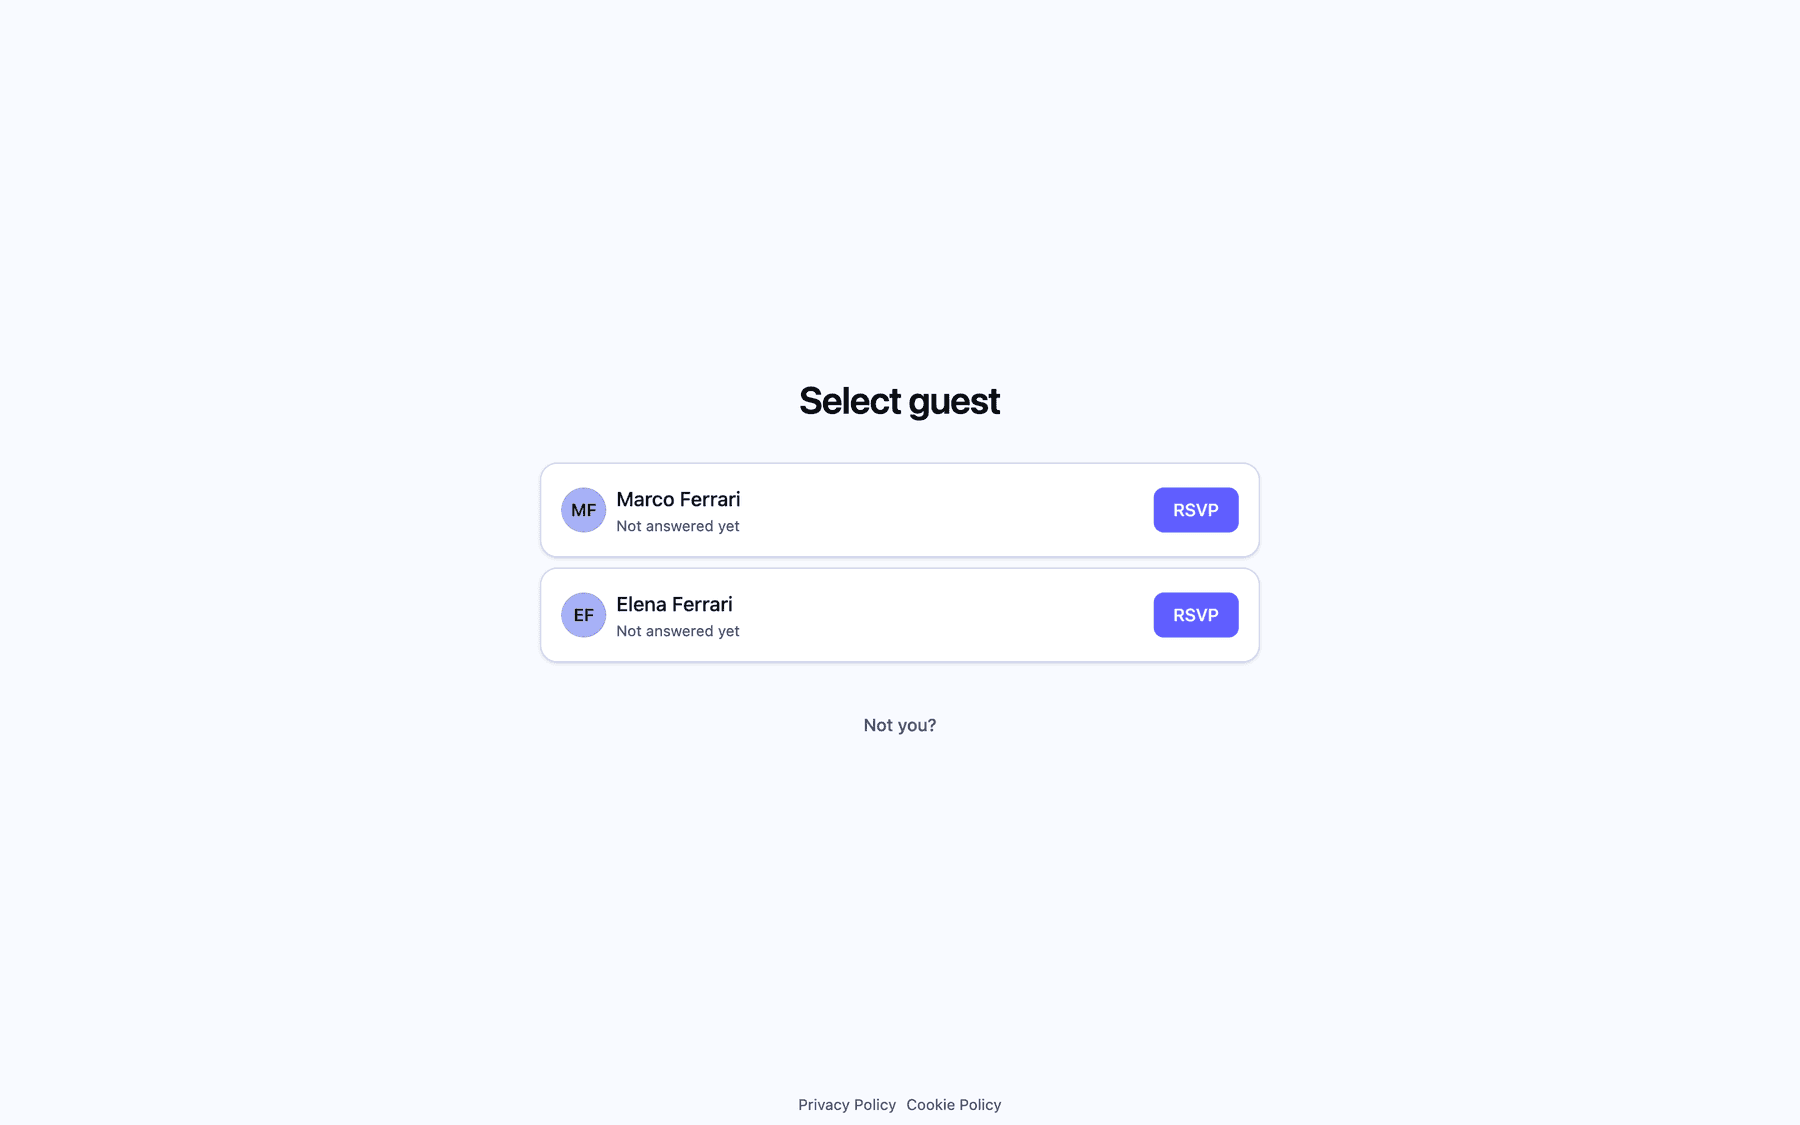
- Select guest. They see everyone in their household (a couple, a family) and pick who they're answering for.
- Questions. They answer your survey section by section.
- Thank you. A closing screen confirms their answers are saved and offers an optional recap: guests can enter an email address and click Send me my responses to receive a copy.
Where each piece of content comes from
Most of what appears on the page is set elsewhere in your project, not on the Customisations page:
| On the RSVP page | Where you set it |
|---|---|
| Event name | Name in Settings > Project details |
| Welcome text under the name | Description in Settings > Project details (up to 300 characters) |
| Event dates | Start date and End date in Settings > Project details |
| "Having trouble accessing? Get help" link | Settings > Support (hidden if you haven't set one) |
| The survey | The Questions page |
For the full tour of the Settings page, see The Settings page explained. For the survey itself, start with Creating questions and question types.
The Customisations page
Colours and fonts live on the Customisations page, in the Admin group of the sidebar. Only project Admins can see it.
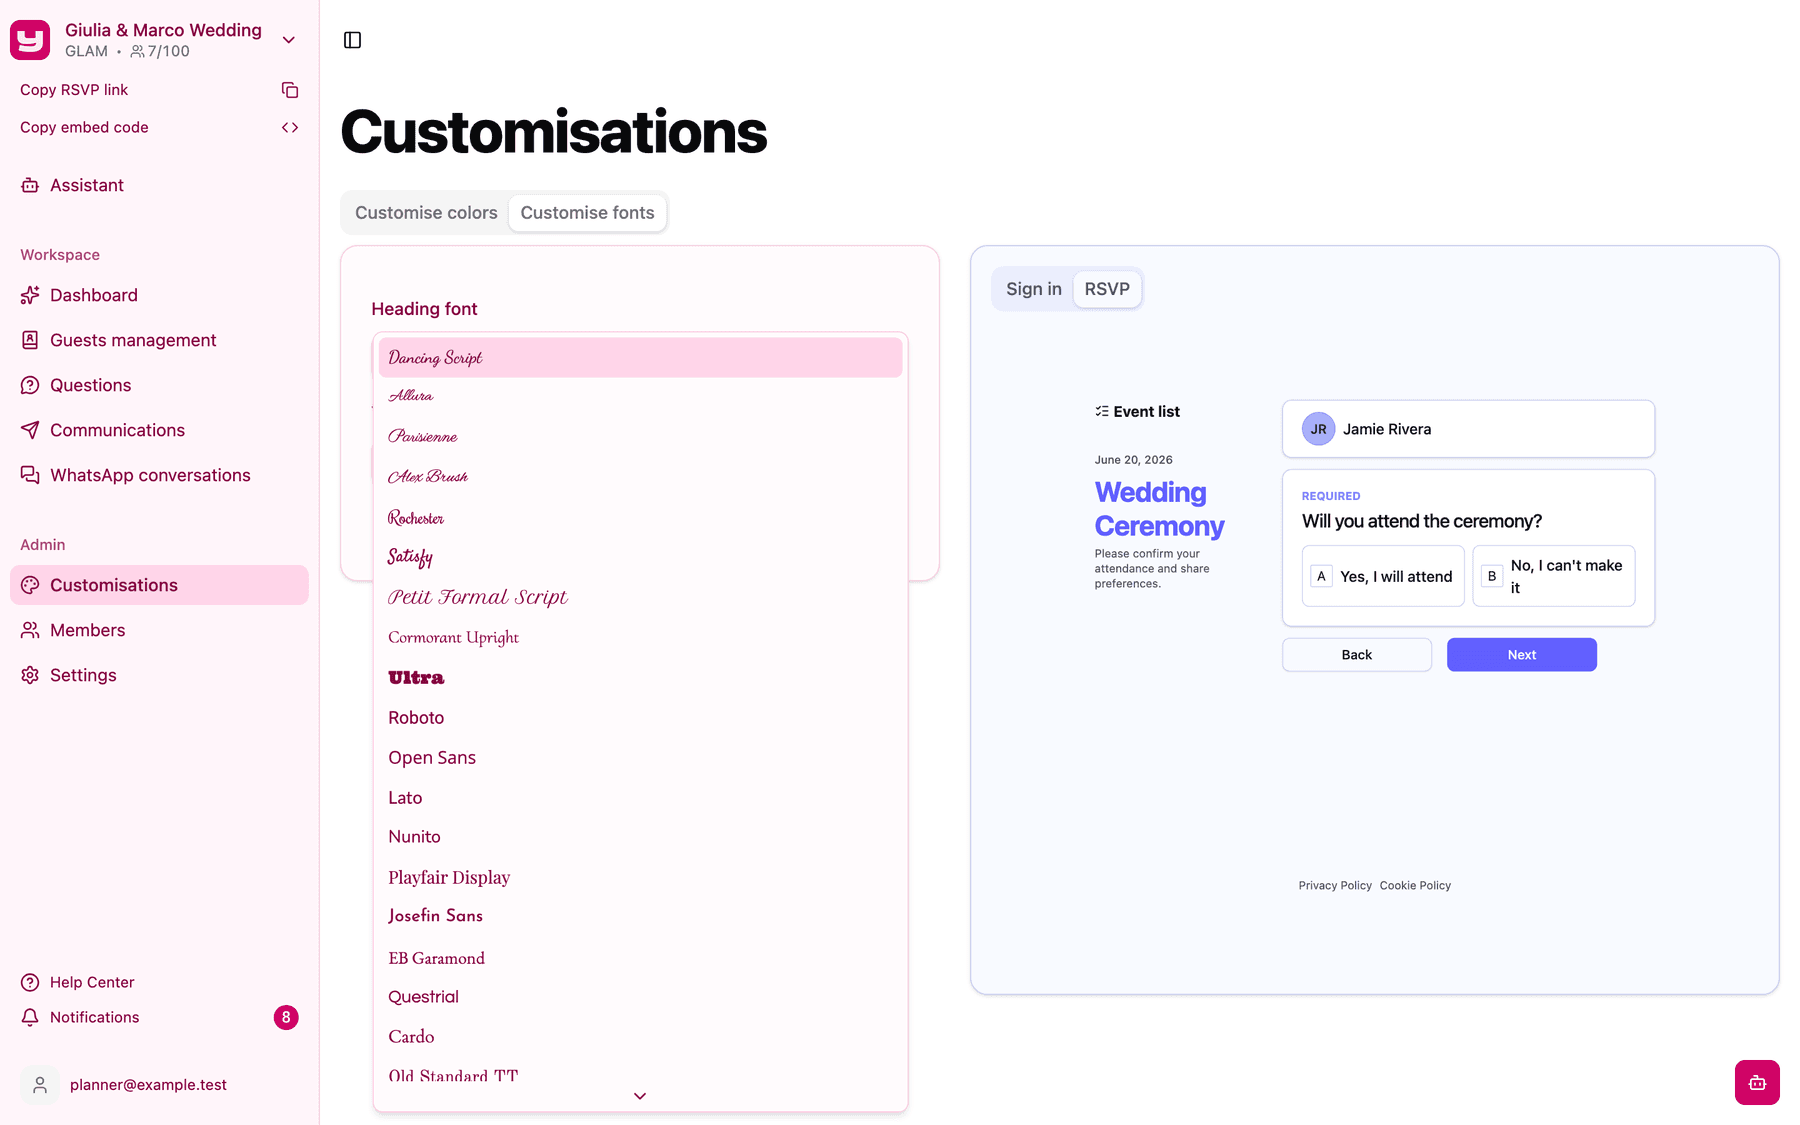
The page has two tabs, Customise colors and Customise fonts, and a live preview on the right (below the settings on smaller screens). The preview updates as you make changes, before you save anything. It has two tabs of its own:
- Sign in shows the sign-in card with your real event name, description and dates.
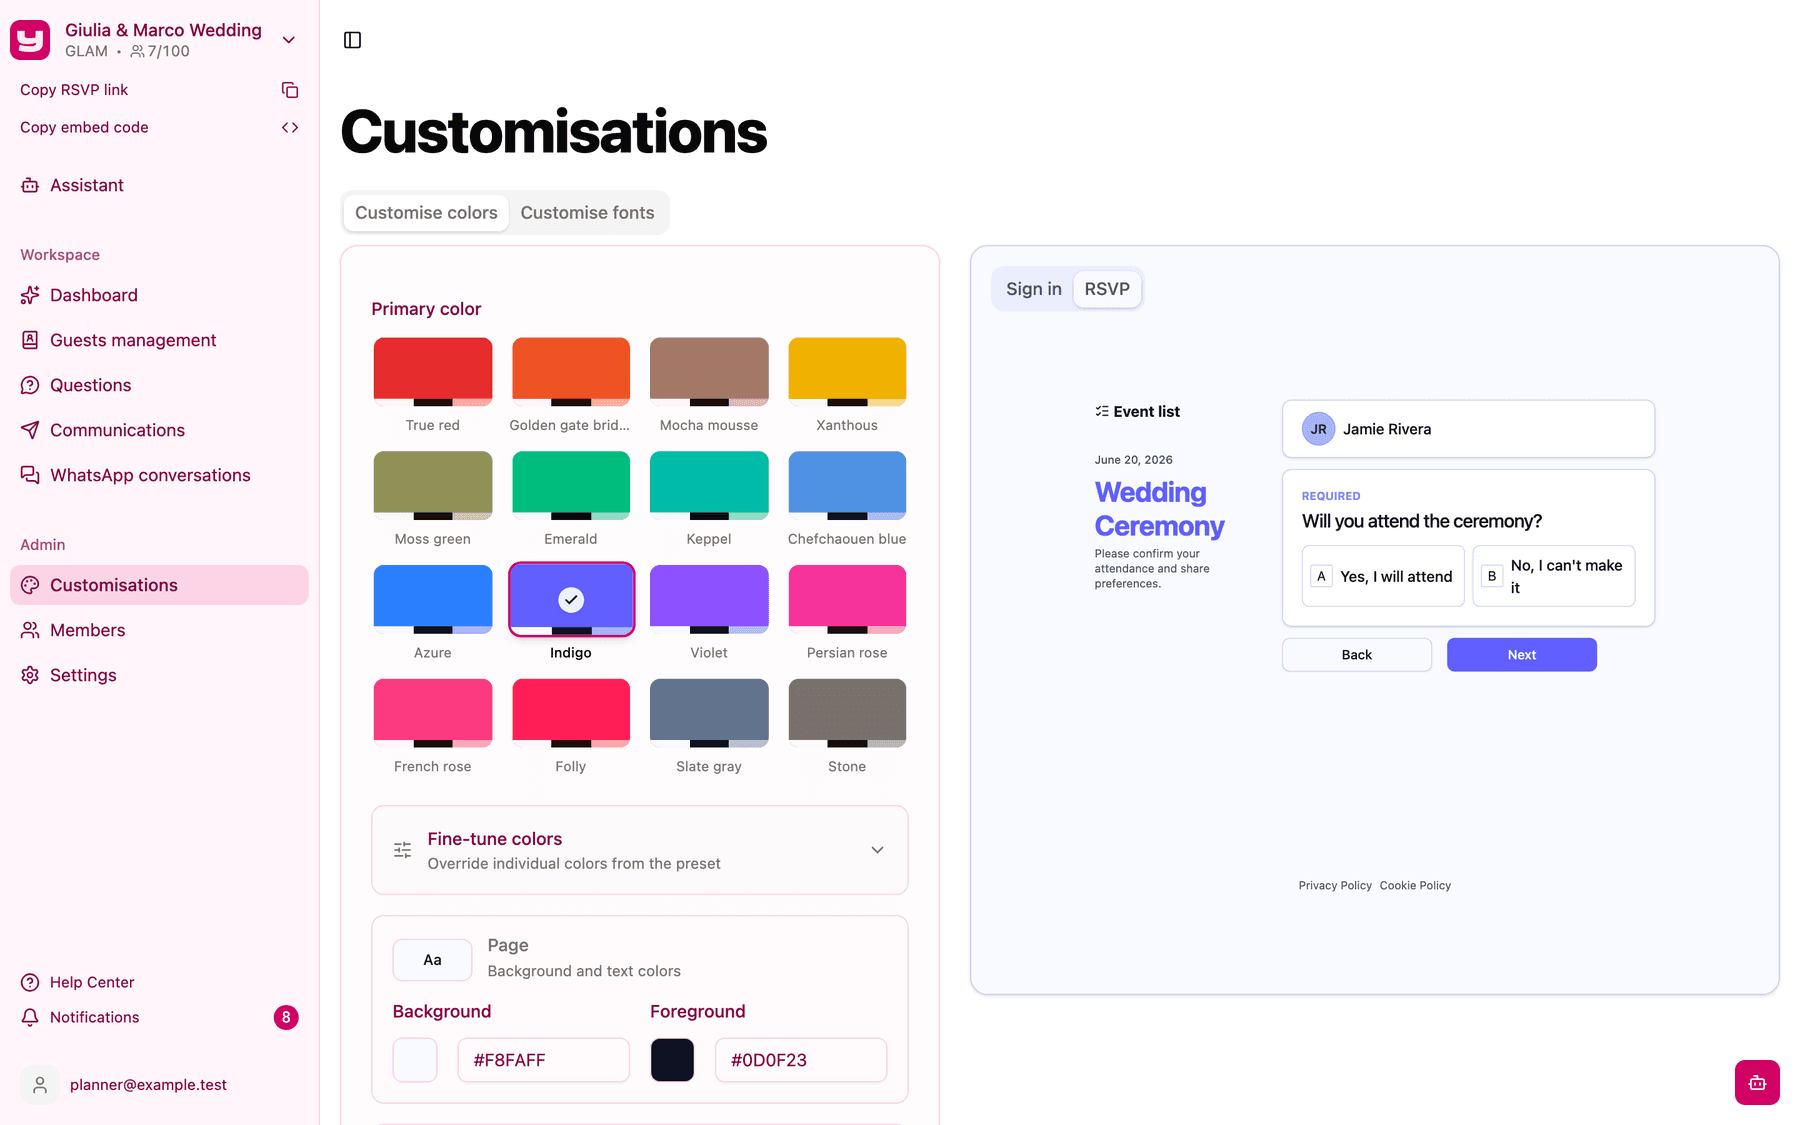
- RSVP shows the survey with sample data (a guest called "Jamie Rivera" and a few example questions), so you can judge buttons, answers and headings in context.
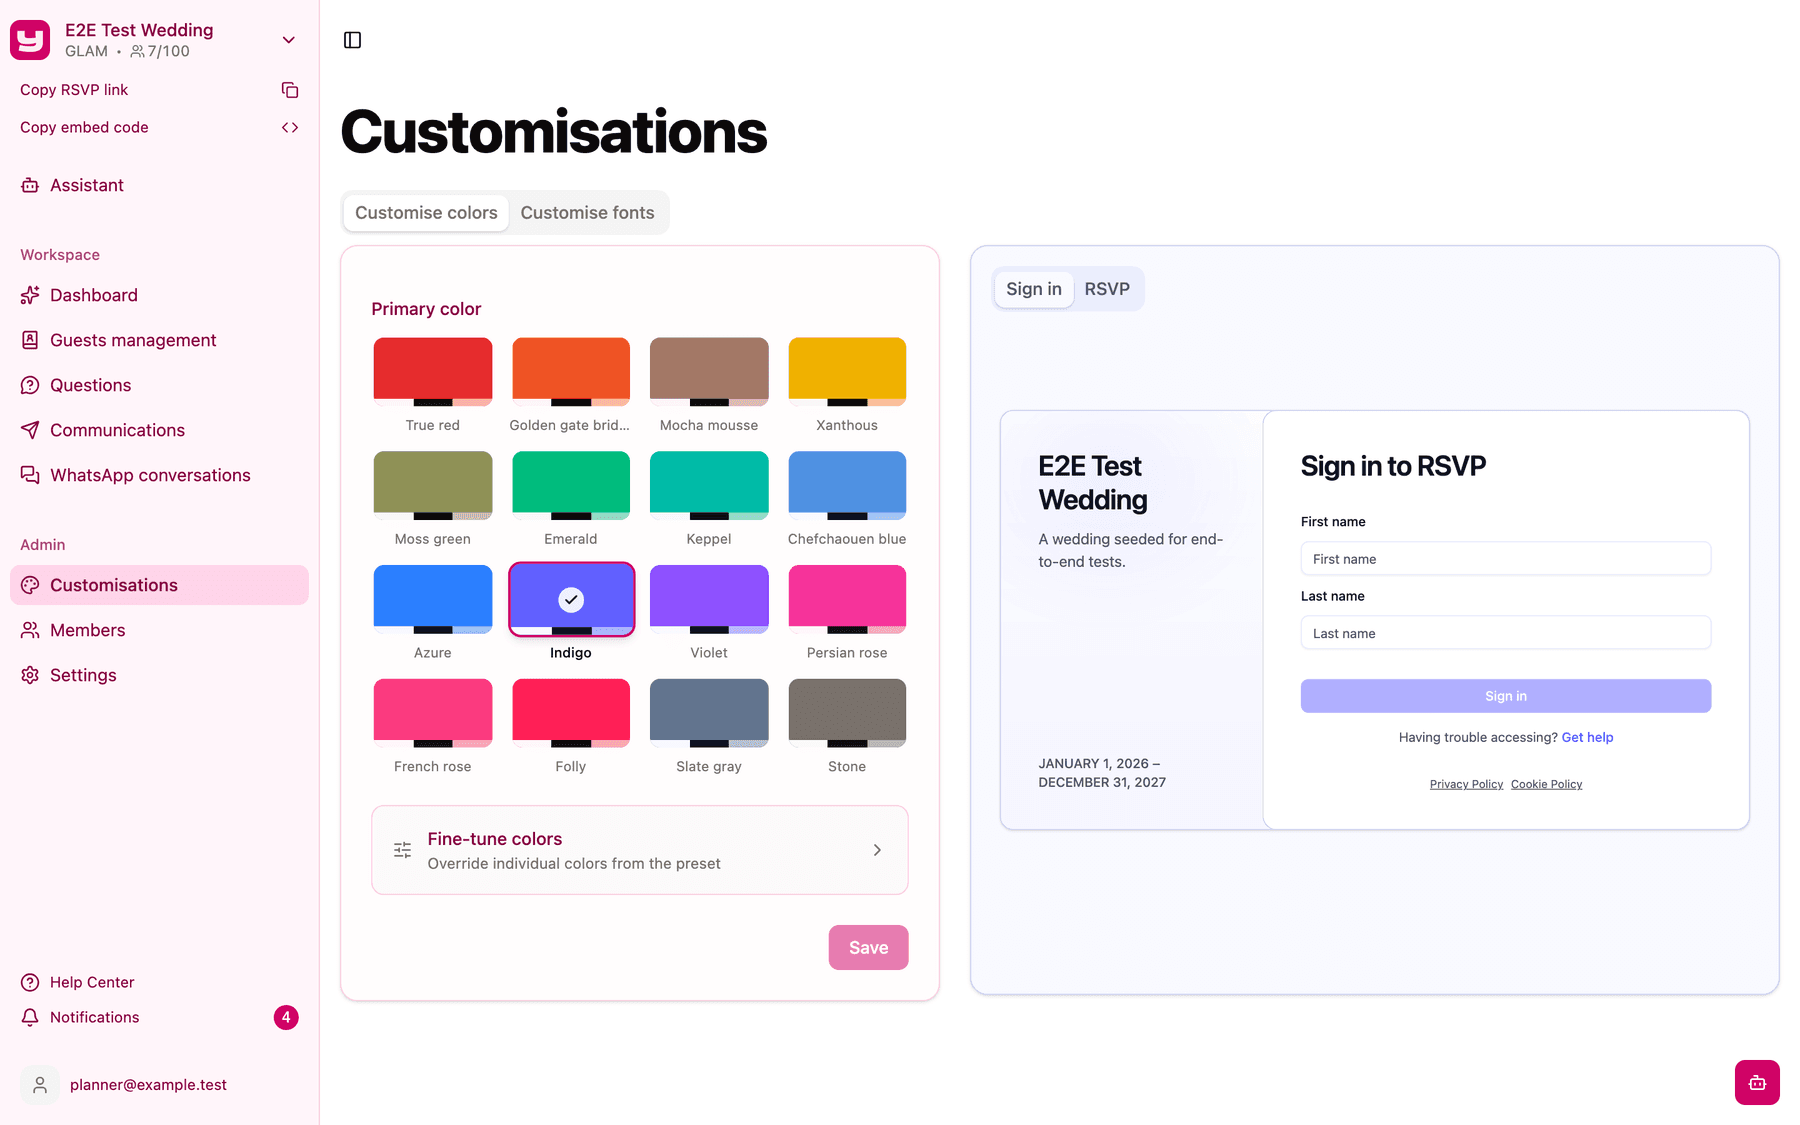
The Save button stays disabled until you change something. Once you save, a confirmation message tells you the project was edited, and your guests see the new look straight away.
Change the colour theme
- Open Customisations from the sidebar. The Customise colors tab is selected.
- Under Primary color, pick one of the 16 presets: True red, Golden gate bridge, Mocha mousse, Xanthous, Moss green, Emerald, Keppel, Chefchaouen blue, Azure, Indigo, Violet, Persian rose, French rose, Folly, Slate gray or Stone. New projects start with Indigo.
- Check the result in the preview, on both the Sign in and RSVP tabs.
- Click Save.
Fine-tune individual colours
A preset sets a whole palette in one click. If you need to match a specific shade (the colour of the invitations, for example), open Fine-tune colors below the presets. It lets you override six colours, grouped by where they appear:
- Page: Background and Foreground (the page background and its text).
- Buttons: Primary and Primary foreground (the main buttons and their text).
- Accents: Secondary and Secondary foreground (secondary elements and their text).
Type a hex value such as #8A6F5C into any field. If a value isn't a valid hex colour, the field tells you so and you can't save until you fix it.
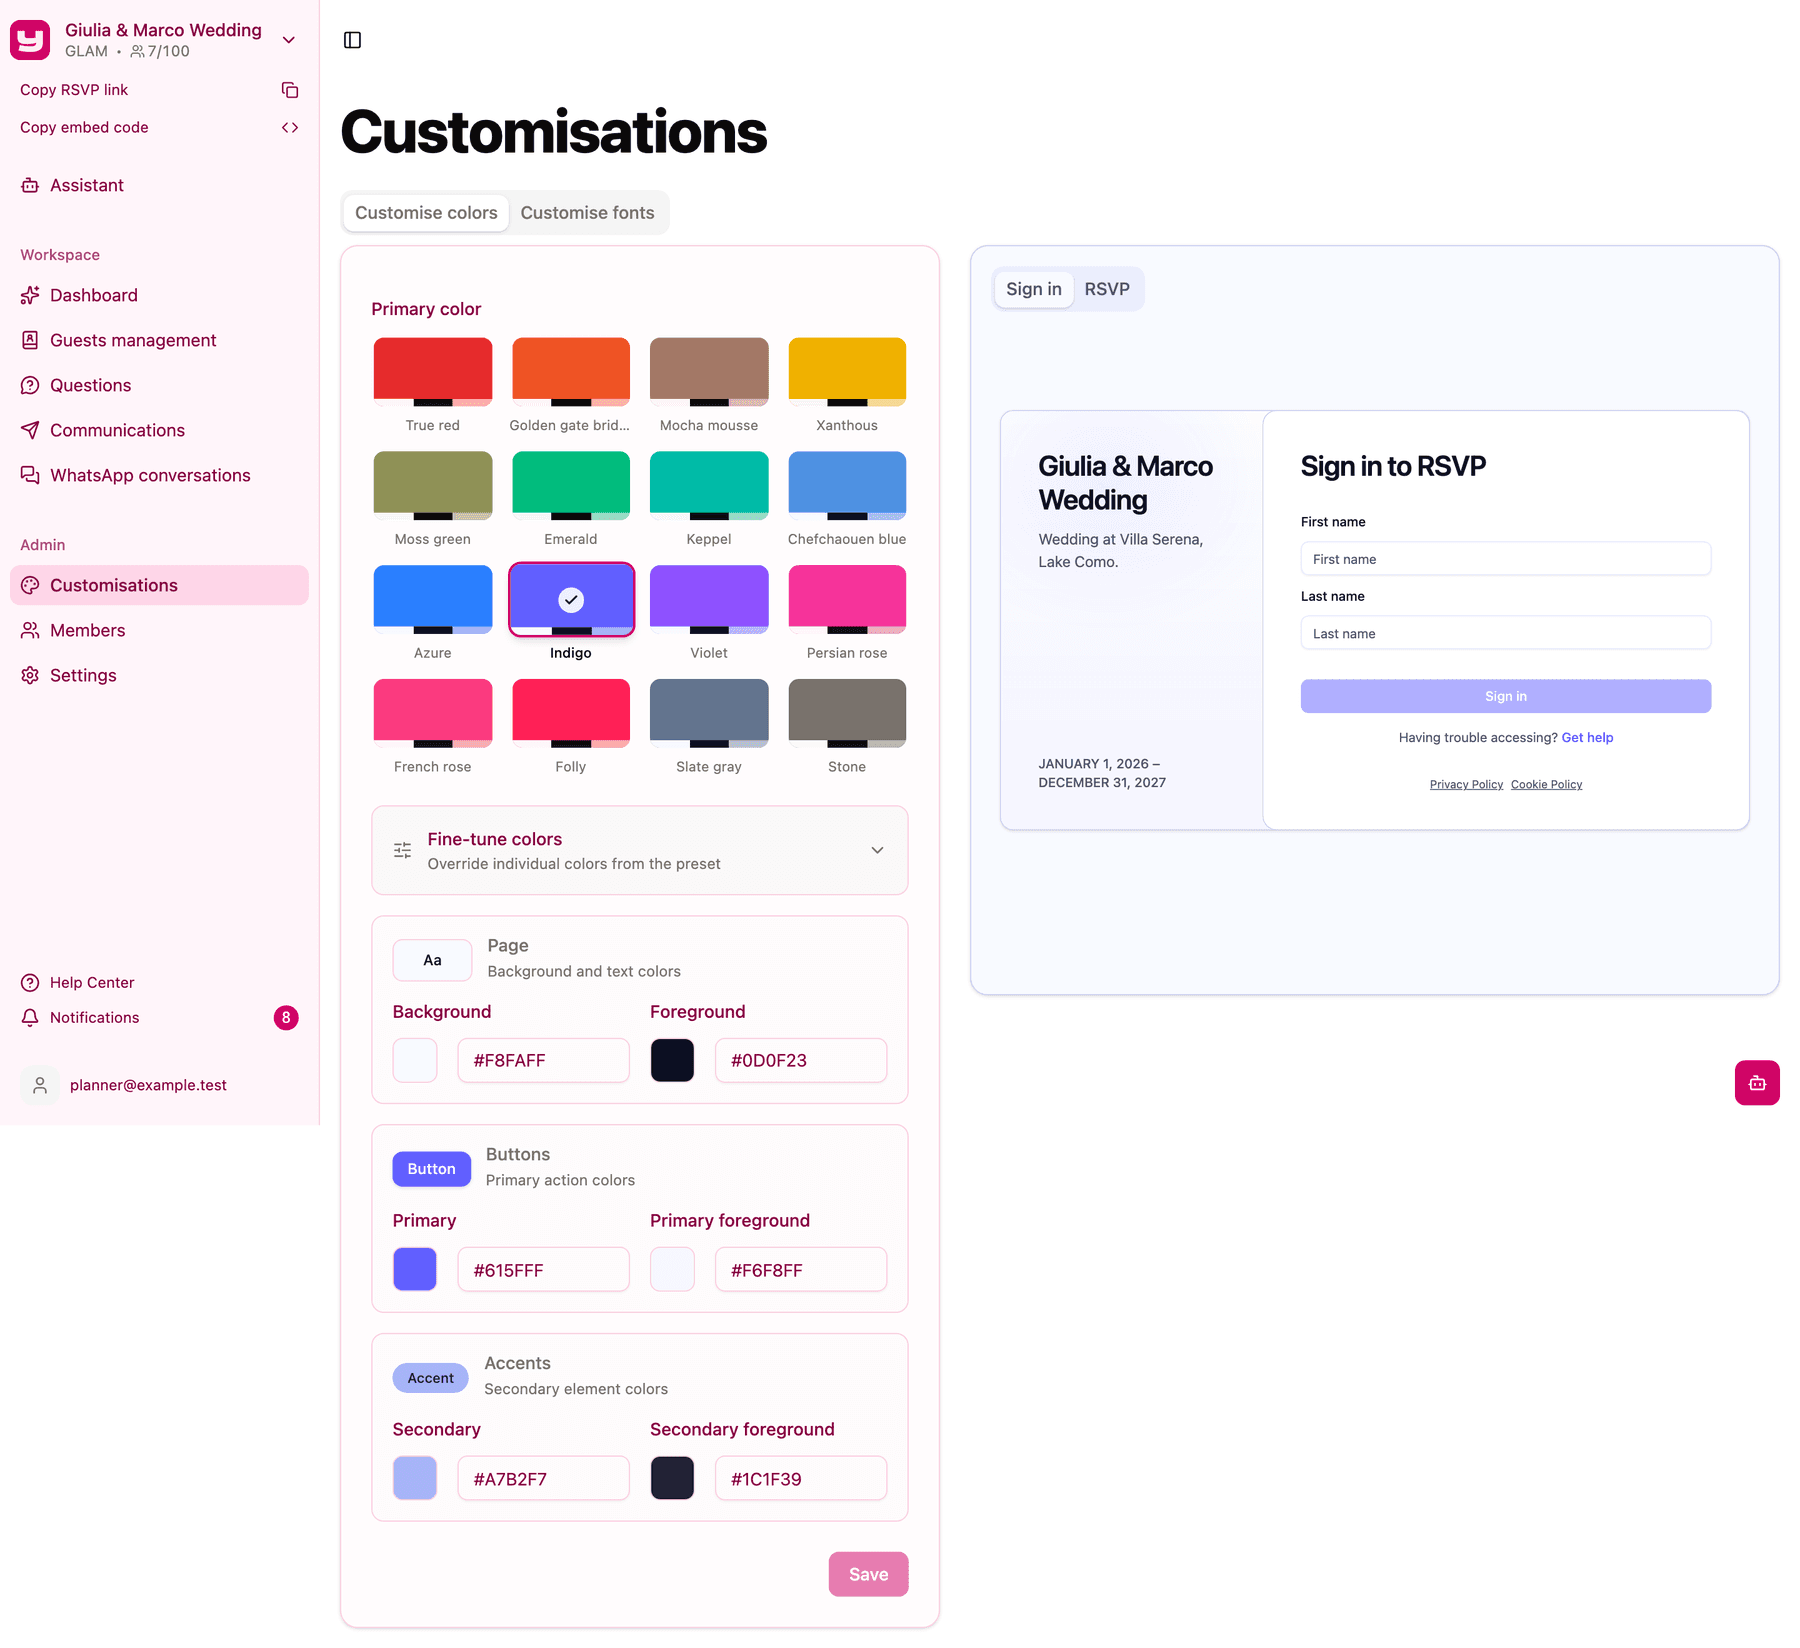
A badge shows how many colours you've customised. Each field has its own Reset to go back to the preset value, and Reset all clears every override at once.
Change the fonts
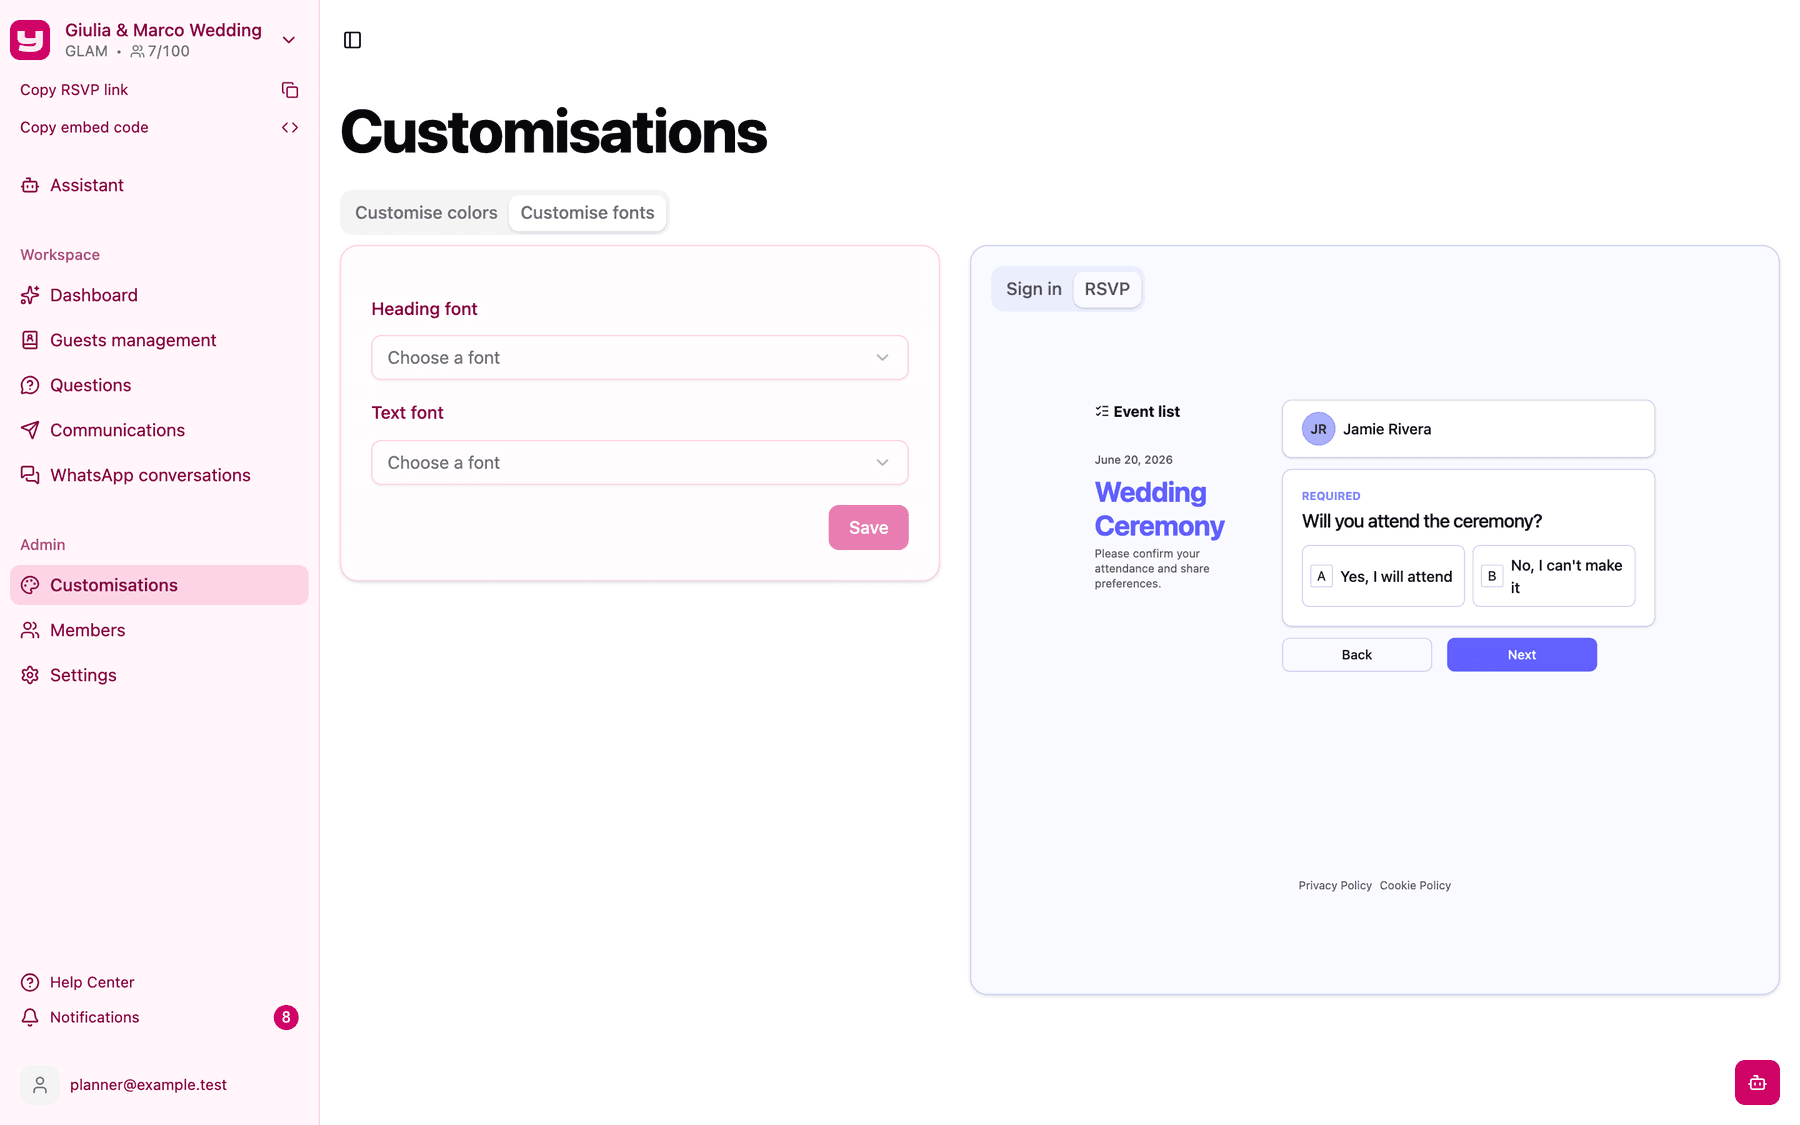
- Open Customisations and switch to the Customise fonts tab.
- Open Heading font and choose the font for titles, such as the event name and section headings. Each font in the list is shown in its own typeface, so you can compare them at a glance. This list includes script fonts (Dancing Script, Allura, Parisienne, Alex Brush and others) that suit a wedding invitation style.
- Open Text font and choose the font for everything else: questions, answers, buttons. It offers the same fonts minus the script ones, which would be hard to read in long text.
- Check the preview and click Save.
How guests sign in
Guests sign in with the name you saved in your guest list. The match is forgiving: it ignores upper and lower case, accents and punctuation, and spaces in last names. So "Nicolo De Luca" finds "Nicolò de Luca". If no guest matches, they see an error asking them to check their first and last name.
After signing in, the Select guest screen lists every member of the household, each marked Answered or Not answered yet. Guests click RSVP to answer for someone, or Edit answers to change a reply already given. If the household has plus-ones available, an Add plus one button appears too; keep in mind that plus-ones count towards your plan's guest limit. The Not you? link signs the guest out, in case someone signed in with the wrong name.
Every time a guest answers or edits their answers, project Admins receive a notification.
What you can't customise yet
To avoid surprises, here's what the RSVP page doesn't support today:
- No logo, cover or background image. The look comes from colours and fonts only.
- No custom welcome or thank-you text. The Description is the only welcome text; the thank-you screen is the same for every project.
- No closing date for RSVPs. The page stays open for the whole life of the project; there's no setting to stop accepting answers on a given date.
- The slug can't be changed from the app. The address is chosen when you create the project. If you really need a different one, contact Invytly support at support@invytly.com (or your Invytly contact person).
- No language switcher. The page follows the language of the guest's browser, falling back to English.
Tips for a page that feels like the wedding
- Start from the closest preset, then use Fine-tune colors only for the one or two shades that really matter. It's quicker and keeps the palette balanced.
- Check contrast in the preview. Make sure button text is easy to read against the button colour, and body text against the background. Many guests will RSVP from a phone, outdoors.
- Keep the Description short. It's the welcome text guests read before signing in: two or three warm sentences work better than a paragraph of logistics.
- Use a script font for headings only. It gives the page character without making questions hard to read.