Sooner or later a guest will call you and say "I can't get in" or "did my answer go through?". The quickest way to help is to know the RSVP page as well as they do. This article follows a guest through the page from the first screen to the last, and ends with a short list of what to tell your guests before you share the link.
To change the colours and fonts of the page, see Customising your RSVP page. To get the link to your guests, see Sharing your RSVP link.
Step 1: the welcome and sign-in screen
When a guest opens your RSVP link, the first screen introduces the event:
- the event name, the description you wrote as a welcome text, and the event dates, all taken from Settings > Project details;
- the sign-in form, titled Sign in to RSVP, with two fields: First name and Last name;
- the Sign in button;
- the "Having trouble accessing? Get help" link, if you've set a support contact (more on this below);
- the Privacy Policy and Cookie Policy links.
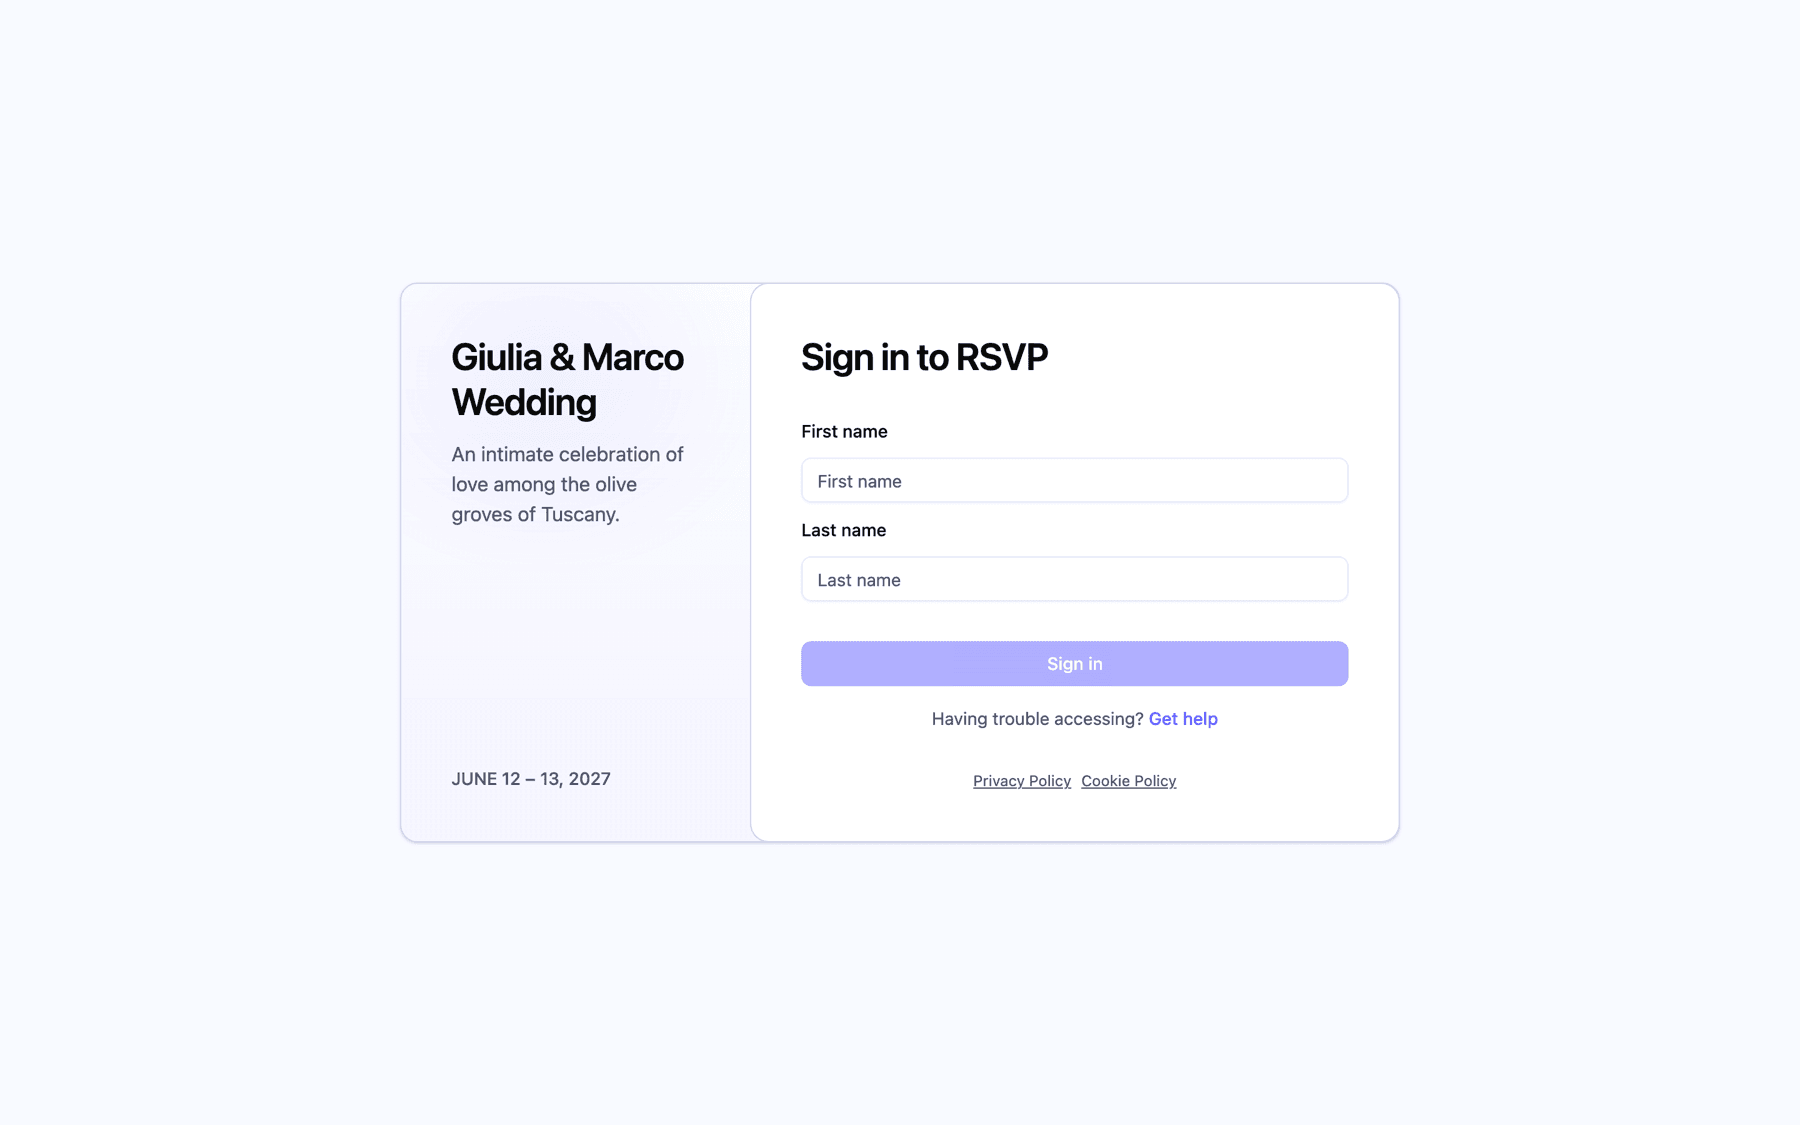
There are no codes, passwords or personal links: guests sign in with their name only, exactly as it's saved in your guest list.
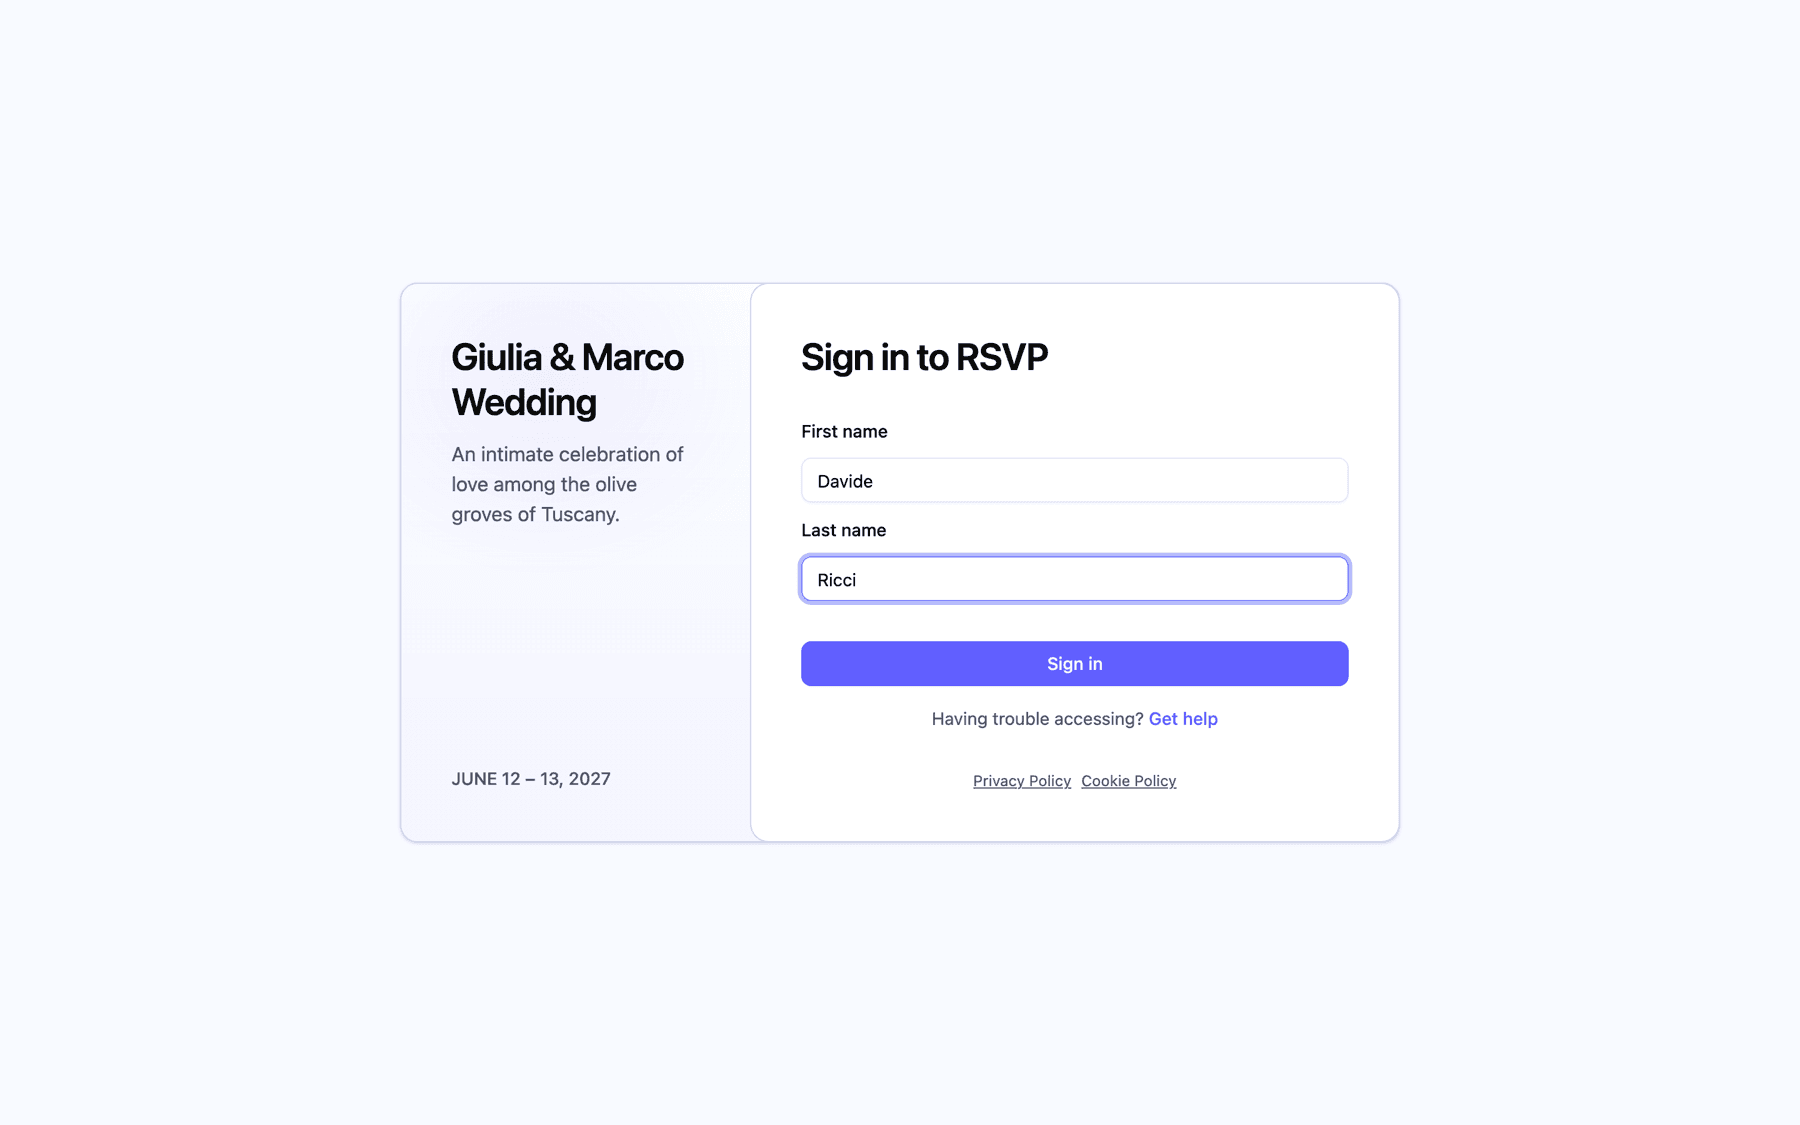
Why spelling matters
Invytly looks for a guest whose first and last name match what they typed. The match is forgiving in some ways and strict in others.
It ignores:
- upper and lower case;
- accents and punctuation, so "Nicolo" finds "Nicolò" and "DAmico" finds "D'Amico";
- spaces in the last name, so "De Luca" and "Deluca" are the same.
It does not forgive:
- Nicknames and short forms. A guest saved as "Elisabetta" who types "Betta" won't be found.
- A missing part of a compound first name. A guest saved as "Anna Maria" must type "Anna Maria"; typing just "Anna" won't work. The opposite is fine: a guest saved as "Anna" can type "Anna Maria".
- Different spellings of the same name, such as "Katia" and "Katya", or a typo in your guest list.
If nothing matches, the guest sees "You have entered an invalid first name and/or last name" under the fields.
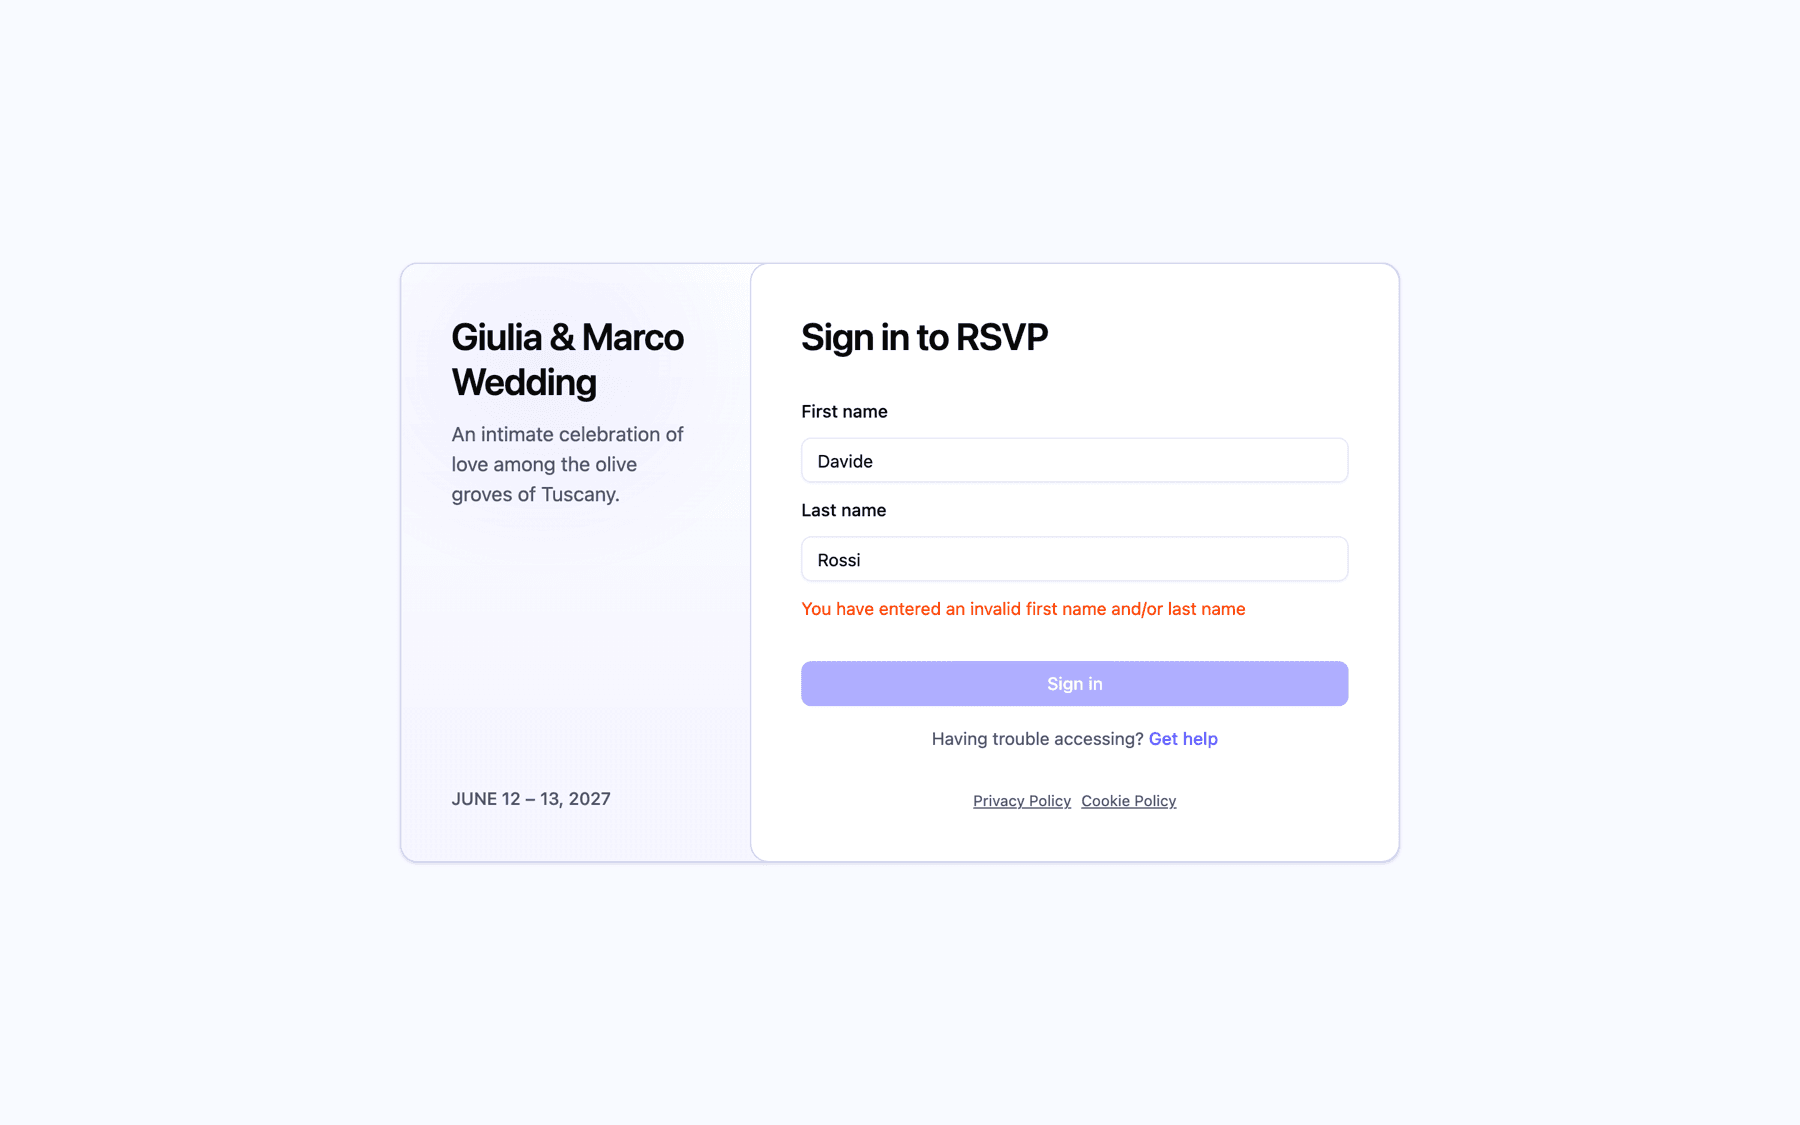
So, when you build the guest list, save each person under the name they will type, usually the one written on the invitation. When you share the link, tell guests to use the same first and last name that appears on their invitation.
Two guests with exactly the same name? The sign-in can't tell them apart, and only one of them will get in. If they belong to the same family, put them in the same household (see Households and plus-ones): whichever signs in can answer for both.
Too many attempts
To protect your guests' data, the page limits how many times someone can try to sign in. After 20 attempts in 10 minutes from the same internet connection, sign-in is paused for a while. During the pause the guest keeps seeing the same "invalid first name and/or last name" message, even with the right name.
If a guest tells you they typed their name correctly and it still doesn't work, first check the spelling in your guest list, then ask them to wait about ten minutes before trying again. Keep in mind that the count is per connection: guests sharing the same Wi-Fi (at the office, for example) share the same limit.
Coming back later
Once signed in, a guest stays signed in while the page is open, even if they reload it. If they close the browser and come back another day, they'll be asked to type their name again as soon as they choose who to answer for. Nothing is lost: the answers they already saved are still there and prefilled.
Step 2: choosing who to answer for
After signing in, the guest reaches the Select guest screen. It lists everyone in their household (just the guest, if they don't belong to one), each with a status:
- Not answered yet, with an RSVP button to start the survey for that person;
- Answered, with a check mark on the initials and an Edit answers link to change the reply.
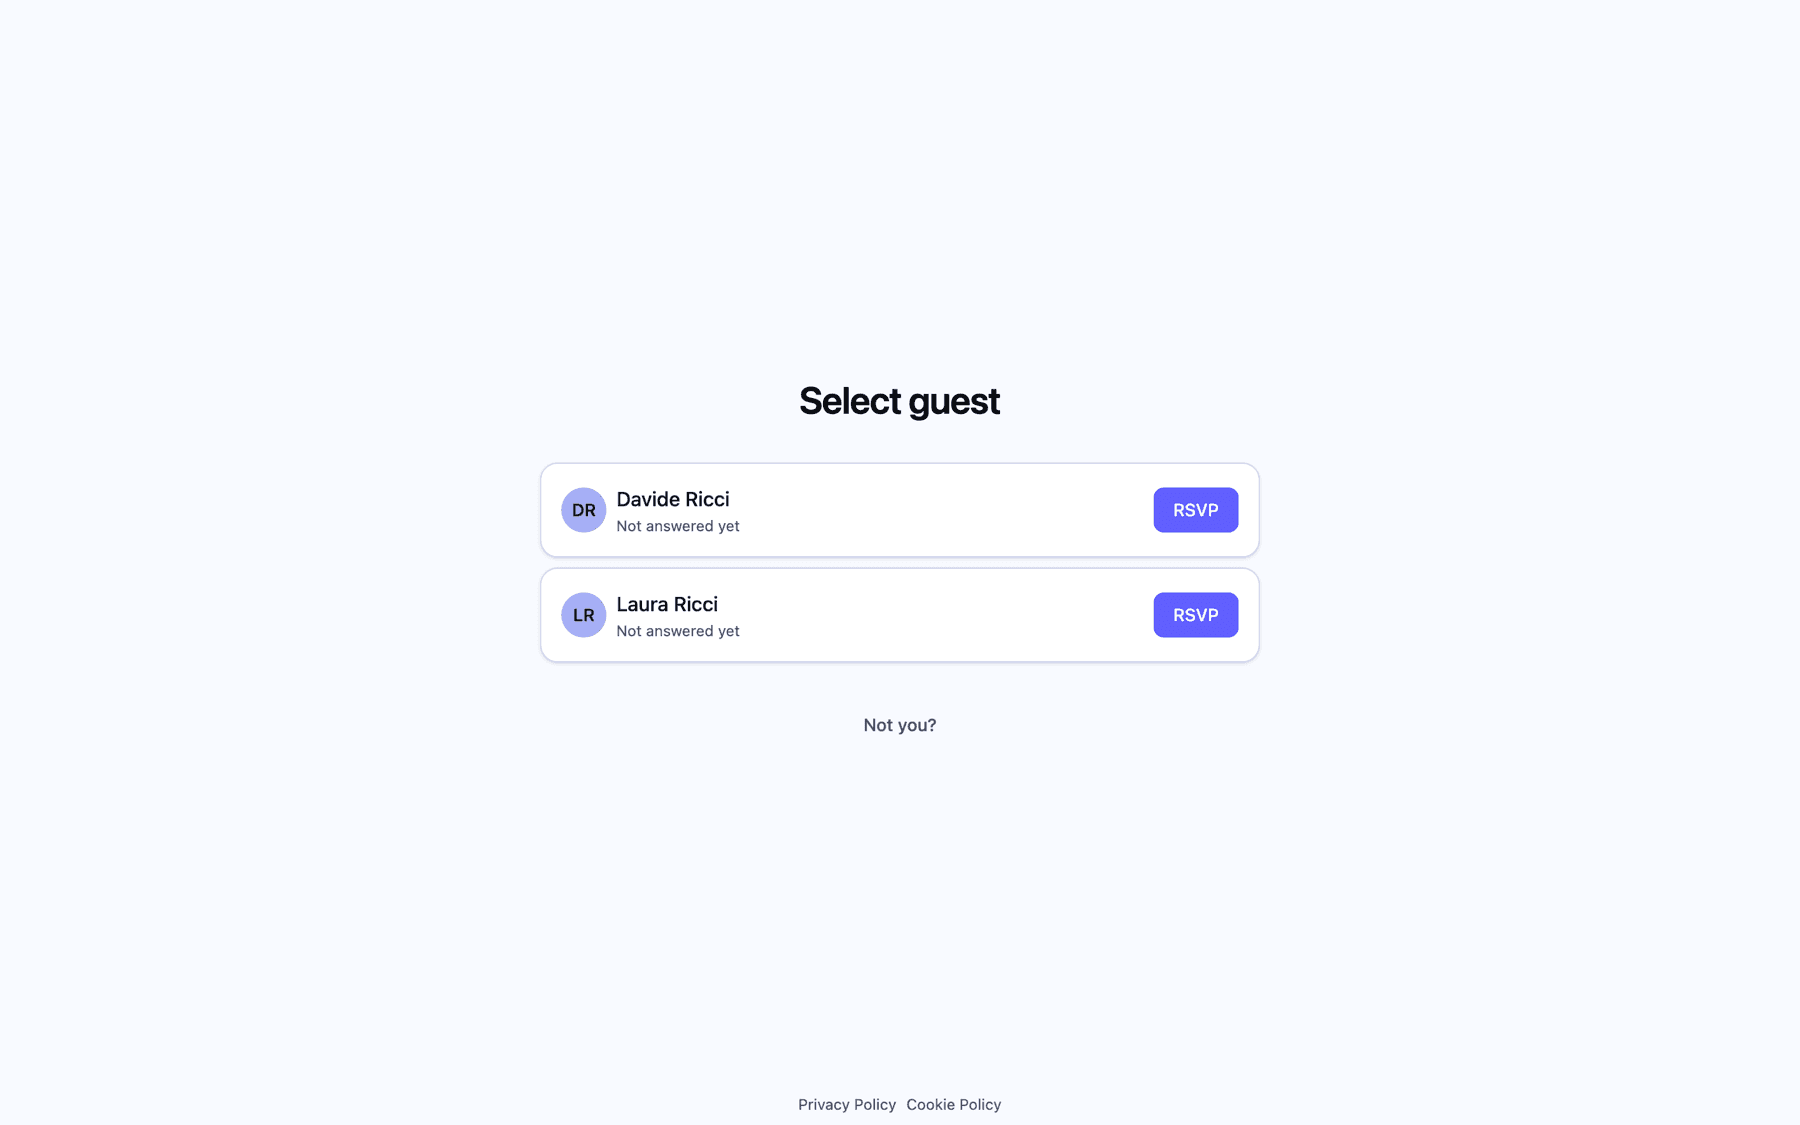
This is how one person can reply for a whole couple or family: they answer for the first member, return to this screen, and answer for the next. Each member has their own answers.
Below the list, the Not you? link signs the guest out, in case someone signed in with the wrong name or is using a shared device.
Adding plus-ones
If the household still has plus-ones available, an Add plus one box appears under the list. The guest clicks it, types the person's first and last name, and clicks Save (or Cancel to close the form). The new person:
- appears in the list straight away, marked Not answered yet, so the guest can answer for them too;
- joins the household and is invited to the same sections as the household member the plus-one belonged to;
- counts towards your plan's guest limit.
Project Admins receive a notification each time a guest adds a plus-one. If your project has reached its guest limit, the plus-one can't be added, so keep some room if you've given out plus-ones (see What to do when you need more guests).
Step 3: the survey, one section at a time
The survey shows one section per step. At the top of each step the guest sees the name of the person they're answering for, so it's always clear whose reply this is.
To help guests see where they are:
- on a computer, an Event list on the left shows every section, with its date for events; the current one is highlighted with its description;
- on a phone, the current section's name, date and description sit above the questions, with a progress bar showing how many steps are left.
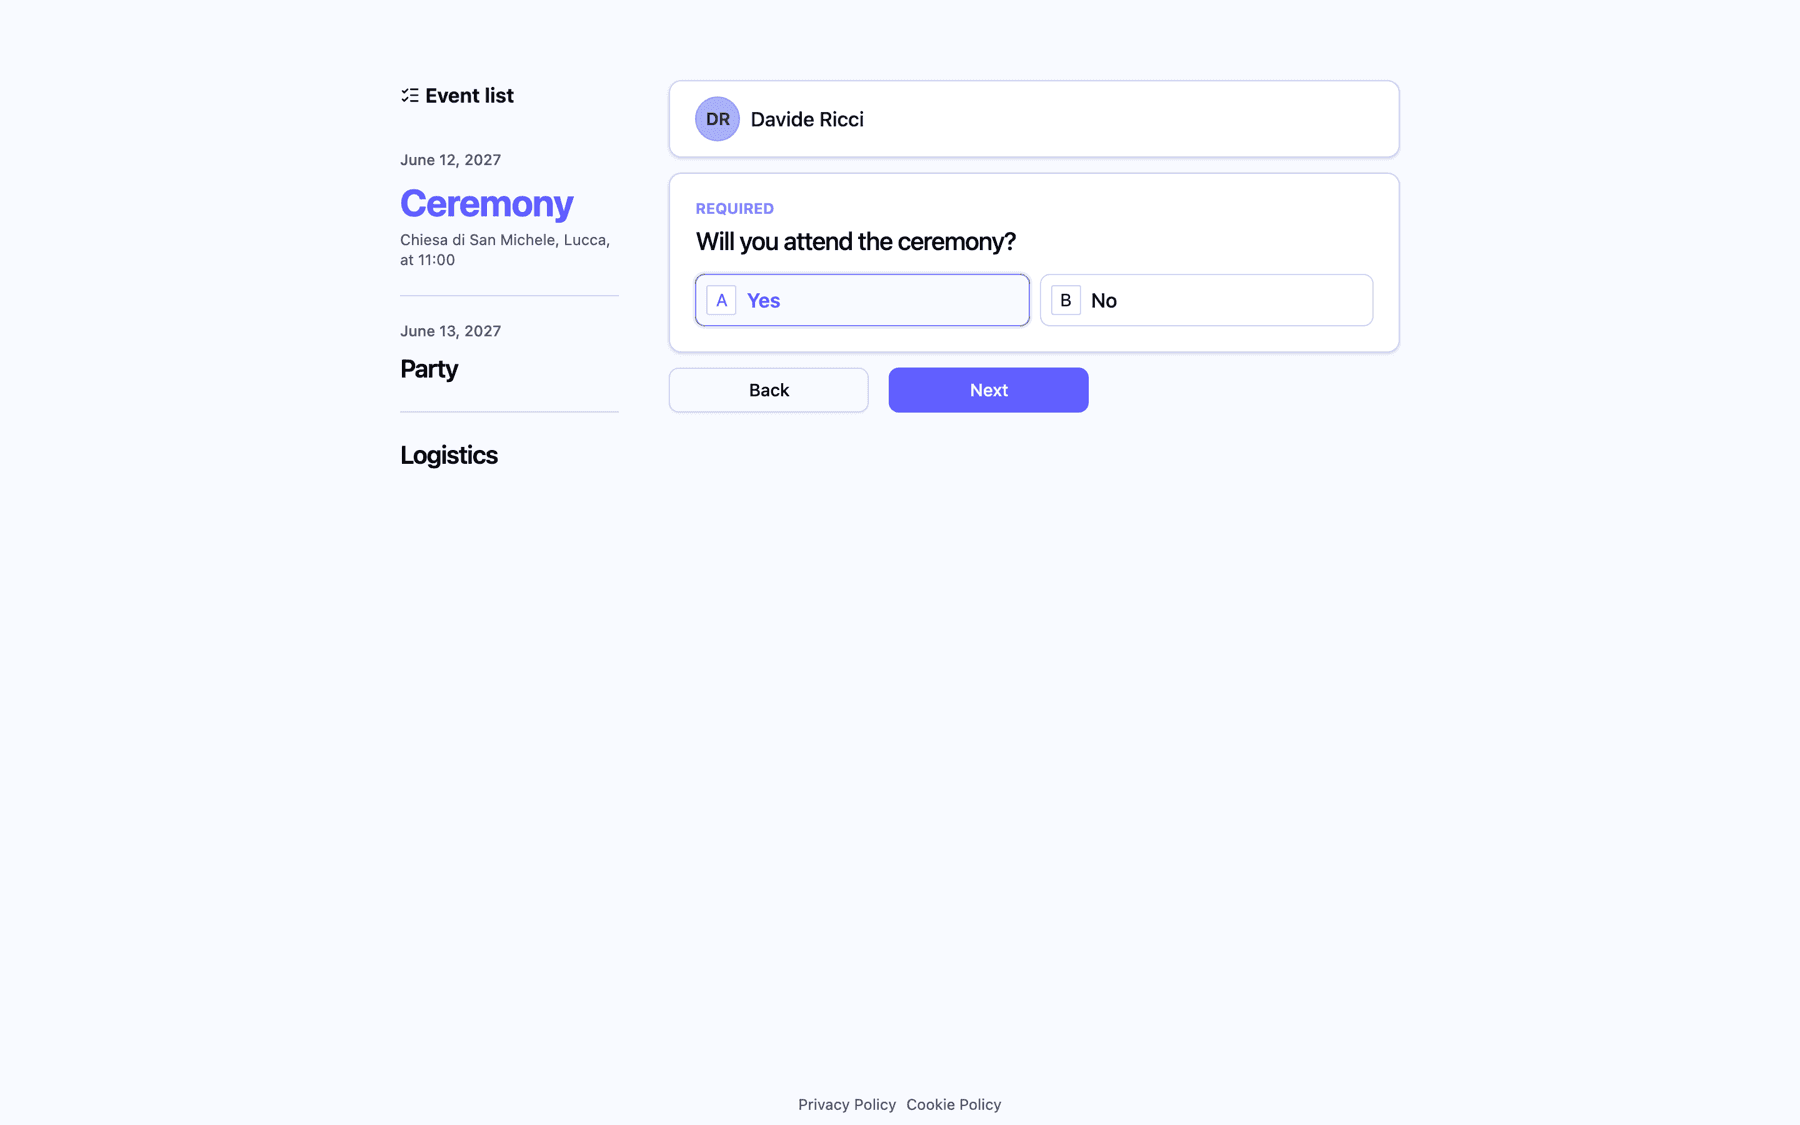
Guests only see the sections you've assigned them to, events first by date and then general sections. For how to build and assign sections, see Organizing questions into sections.
Saving section by section
Each step ends with two buttons:
- Next checks the answers (mandatory questions must be filled in) and saves the section before moving on.
- Back goes to the previous section. From the first section, it goes back to the Select guest screen.
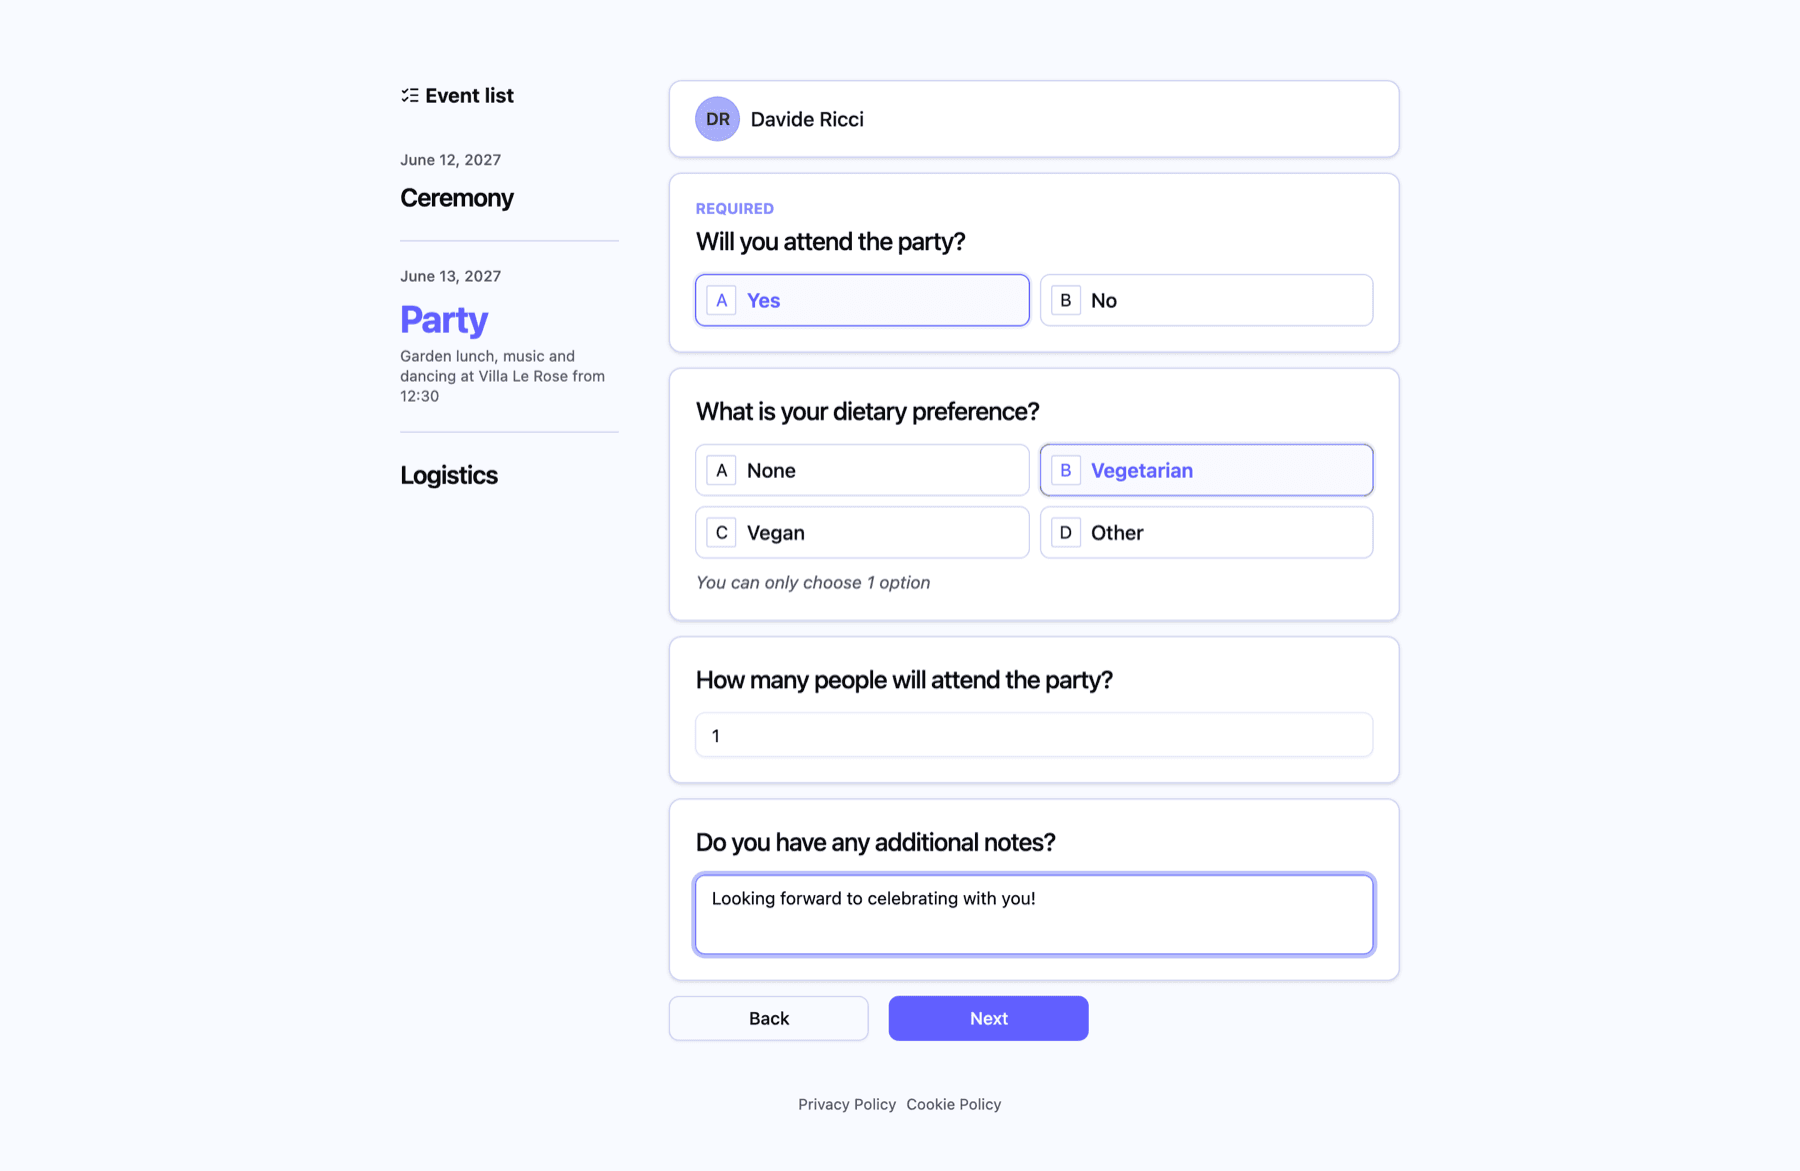
Because each section is saved when the guest clicks Next, a guest who stops halfway doesn't lose the sections they've already completed. They still appear as Not answered yet, though, until they reach the end of the survey.
If the guest has changed something in the current section and clicks Back, the page asks for confirmation: "If you leave this page, all changes will be discarded. Do you want to continue?". The changes to that section are lost only if they confirm; sections already saved with Next are safe.
If your survey has an Email or Phone number question, what the guest types there also updates their email address or WhatsApp number in your guest list.
How a "No" shortens the form
When an event section starts with a mandatory Yes/No question, such as "Will you participate?", that question decides what comes next:
- If the guest answers No, the other questions of that section disappear from the page, and they move on to the next section.
- If the guest answers No to every event they're invited to, the survey ends after the last event: general sections (menu, allergies, transport) are skipped, because there's no point asking them to someone who isn't coming.
This is why the attendance question should always come first in an event section; see Creating questions and question types.
Step 4: the thank-you screen and the recap email
After the last section, the guest sees Thank you for your RSVP. and a short message confirming that their responses have been saved. At that moment:
- the guest is marked as Answered in your project;
- project Admins receive a notification that the guest has answered the RSVP (or has edited it, if they had already answered before).
The thank-you screen also offers an optional recap by email. The guest types an address in the Insert your email field (it's prefilled if you already have their email) and clicks Send me my responses. Invytly sends a summary of their answers to that address. If the guest didn't have an email address in your guest list, the one they typed is saved to their guest record.
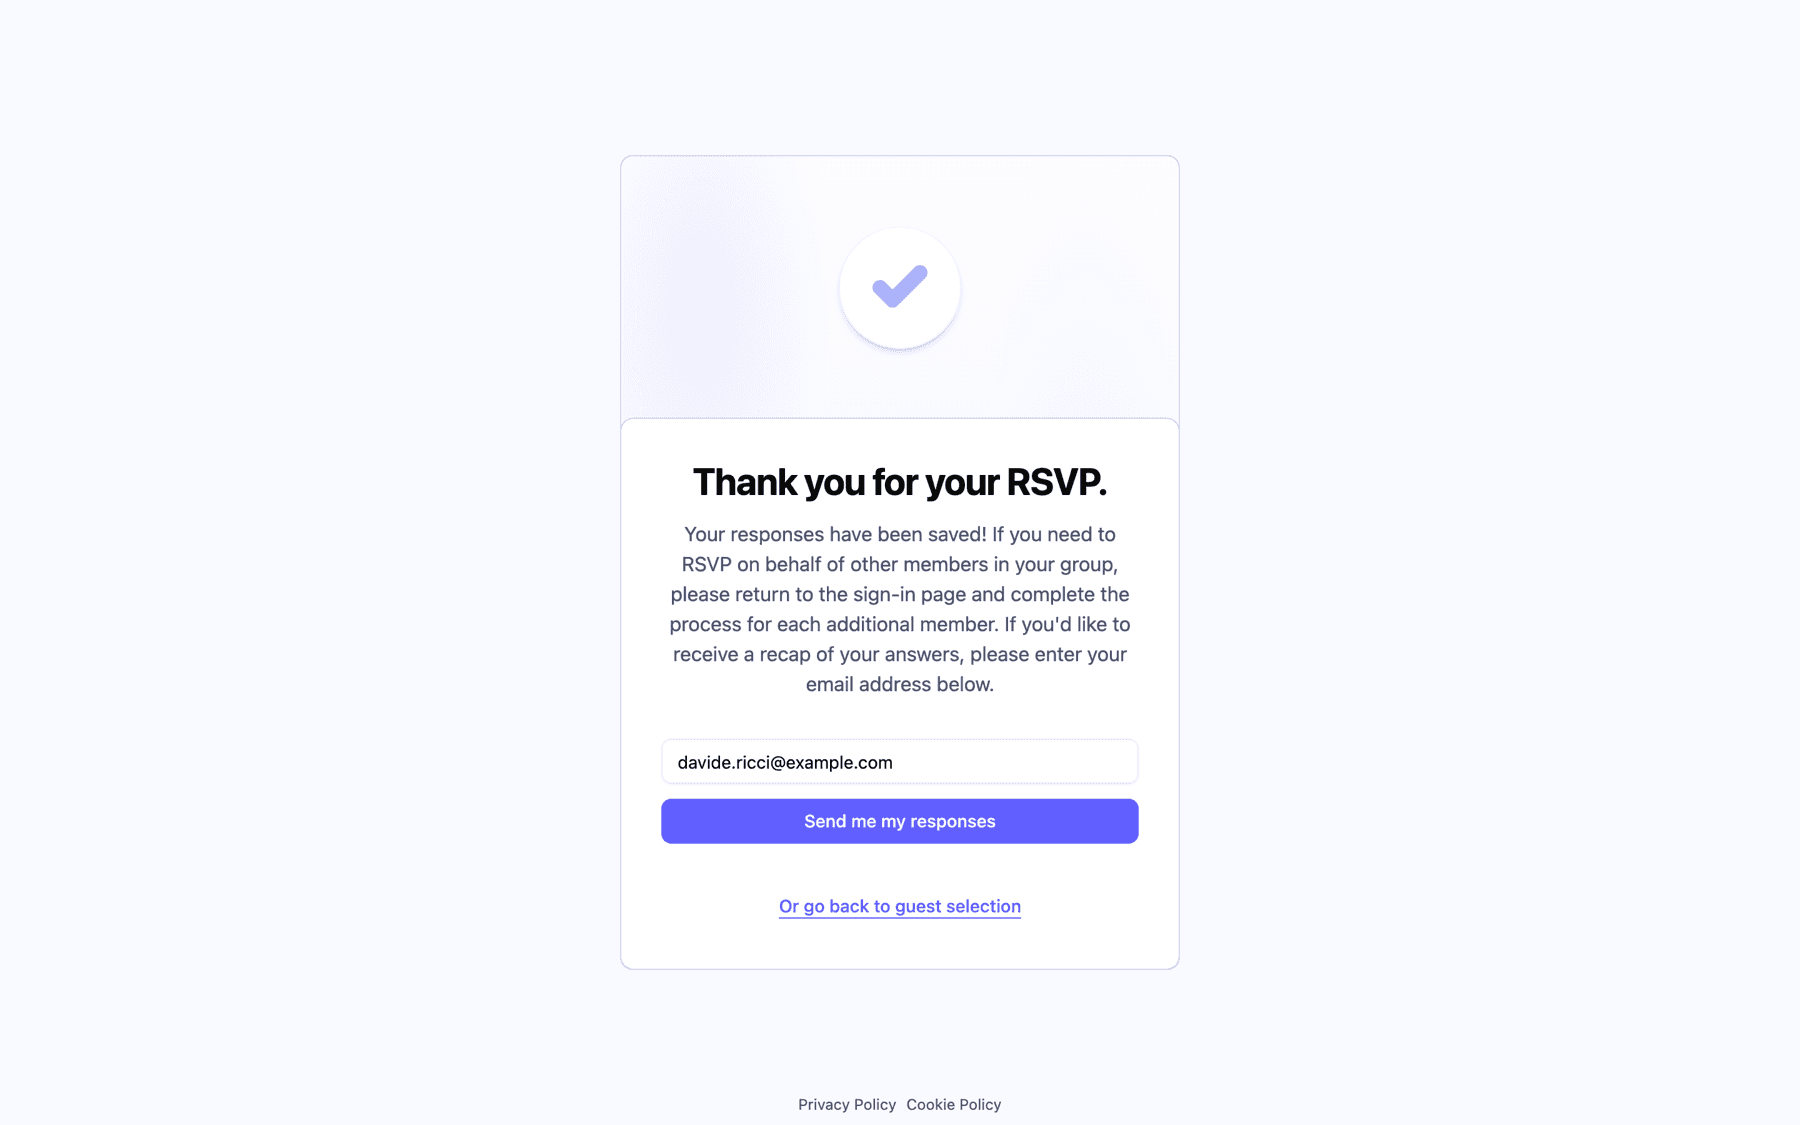
The recap is only sent when the guest asks for it: there's no automatic confirmation email. Guests who don't want it can click Or go back to guest selection to return to the Select guest screen, for example to answer for another member of the household. Sending the recap also brings them back there.
Changing answers later
The RSVP page stays open for the whole life of the project, so guests can change their minds. They open the same link, sign in with their name, and click Edit answers next to their name. The survey reopens with every saved answer prefilled; they change what they need and click Next through to the end.
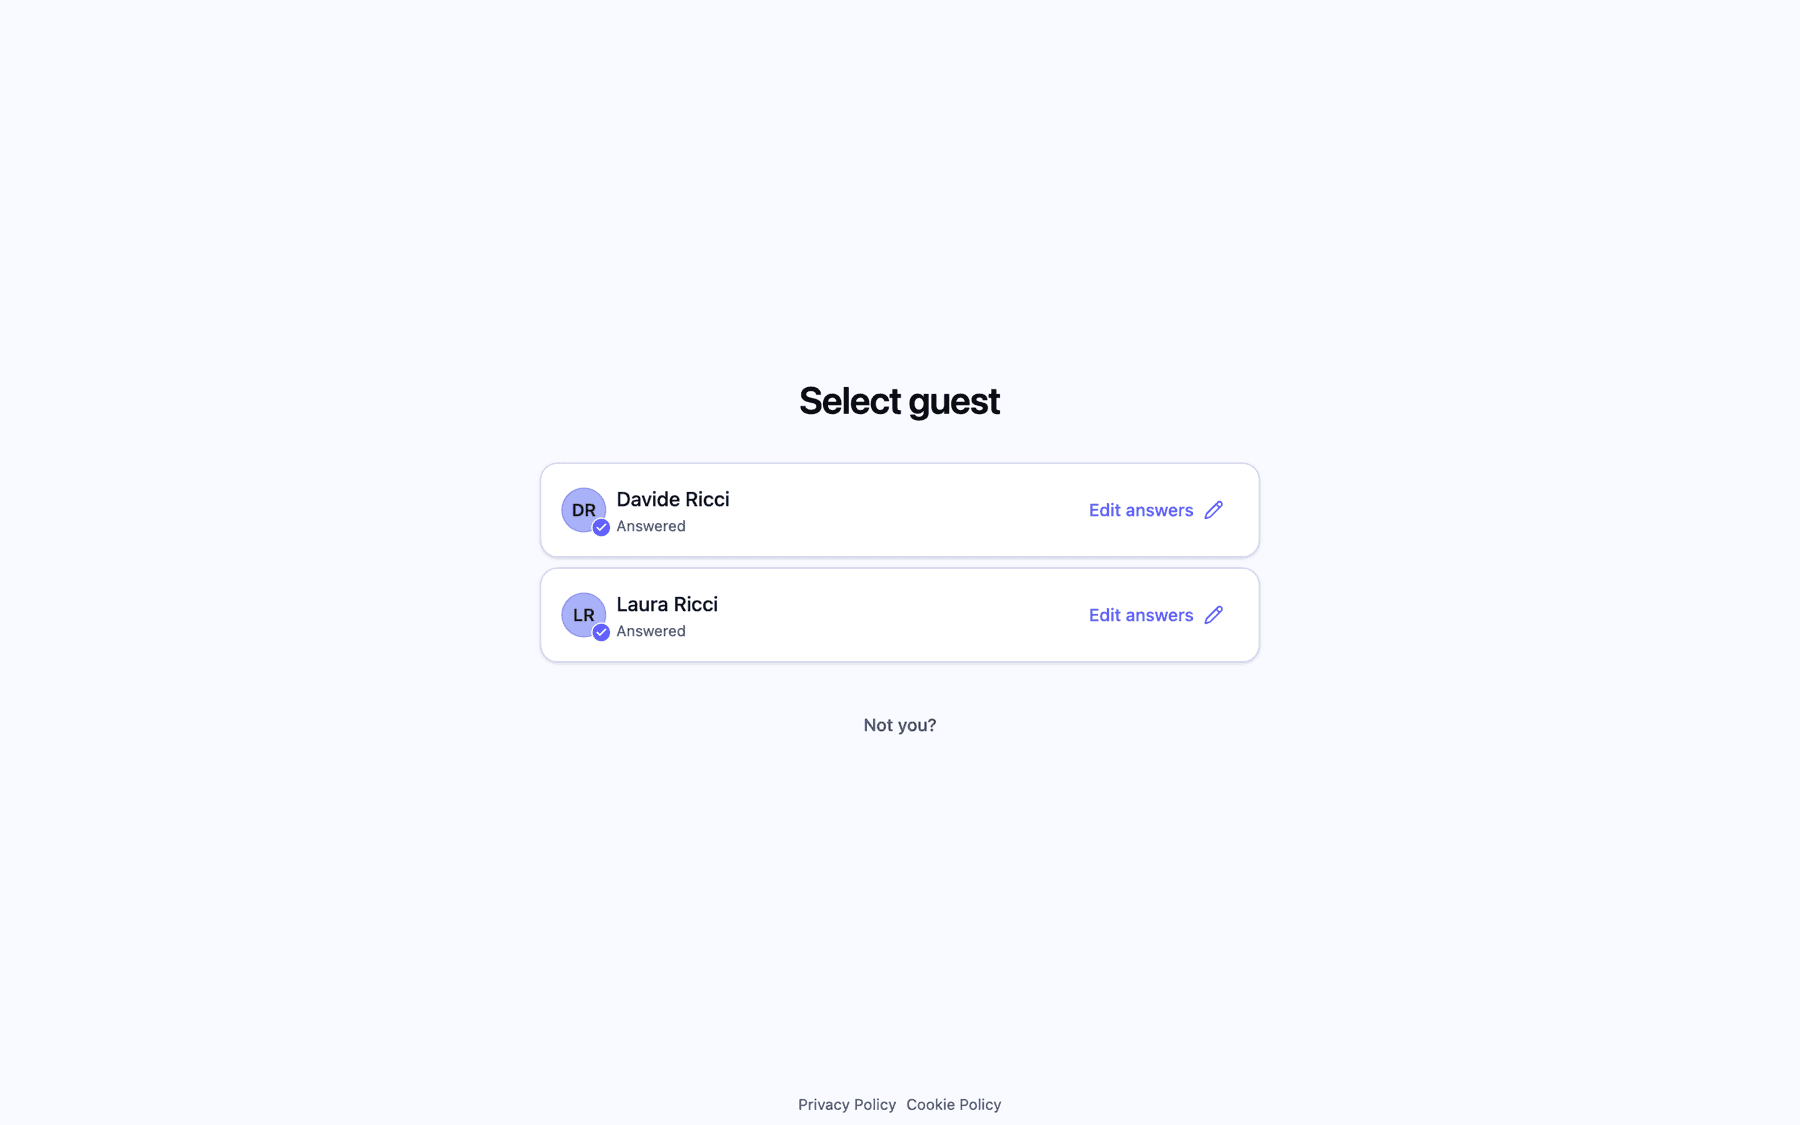
When they finish, Admins get a notification that the guest has edited the RSVP. If the guest switches an event from Yes to No, their other answers for that event are cleared, and if they now decline every event, their answers in the general sections are cleared too.
Getting help and signing out
On the sign-in screen, the "Having trouble accessing? Get help" link opens the support contact you've set in Settings > Support (a WhatsApp chat or an email). It's the safety net for guests whose name doesn't match: make sure it points to someone who will answer. If you haven't set a contact, the link doesn't appear. See The Settings page explained.
To sign out, guests click Not you? on the Select guest screen. This is worth mentioning to guests who RSVP from a shared or borrowed device.
The privacy and cookie pages
Every screen of the RSVP page has two small links at the bottom:
- Privacy Policy opens the privacy notice for guests. It explains which data is collected, why, and how long it's kept, and names the event organiser as the data controller, with the contact details Invytly has on file for your project. If the page says that the privacy notice is currently unavailable, write to Invytly support at support@invytly.com so it can be completed.
- Cookie Policy explains that the page only uses technical cookies and browser storage needed to keep guests signed in, and no profiling, marketing or analytics cookies. That's why the page shows no cookie banner.
What to tell your guests
Before you share the link, send guests a few lines with these points:
- Sign in with your first and last name as written on the invitation. No codes or passwords are needed.
- If you have a double first name, type all of it. Don't use nicknames.
- You can answer for your whole household. After answering for yourself, go back to the list and answer for each person.
- Click Next on every step until you see the thank-you screen. Your answers are only complete when you get there.
- If you'd like a copy, enter your email on the thank-you screen. Nothing is sent automatically.
- You can change your answers later with the same link, by clicking Edit answers.
- Can't get in? Use the Get help link on the sign-in screen. If the name is right and it still doesn't work, wait ten minutes and try again.