Even when you import most of the list from a file, there's always someone to add later: a late confirmation from the couple, a colleague who was forgotten, a new partner. This article covers everything you do with single guests on the Guest management page: adding them, editing their details, finding them and removing them.
Only project Admins can manage guests: the Guest management page doesn't appear in the sidebar for the other roles. If you have a whole list to bring in, start with Importing guests from a CSV file.
The guest list at a glance
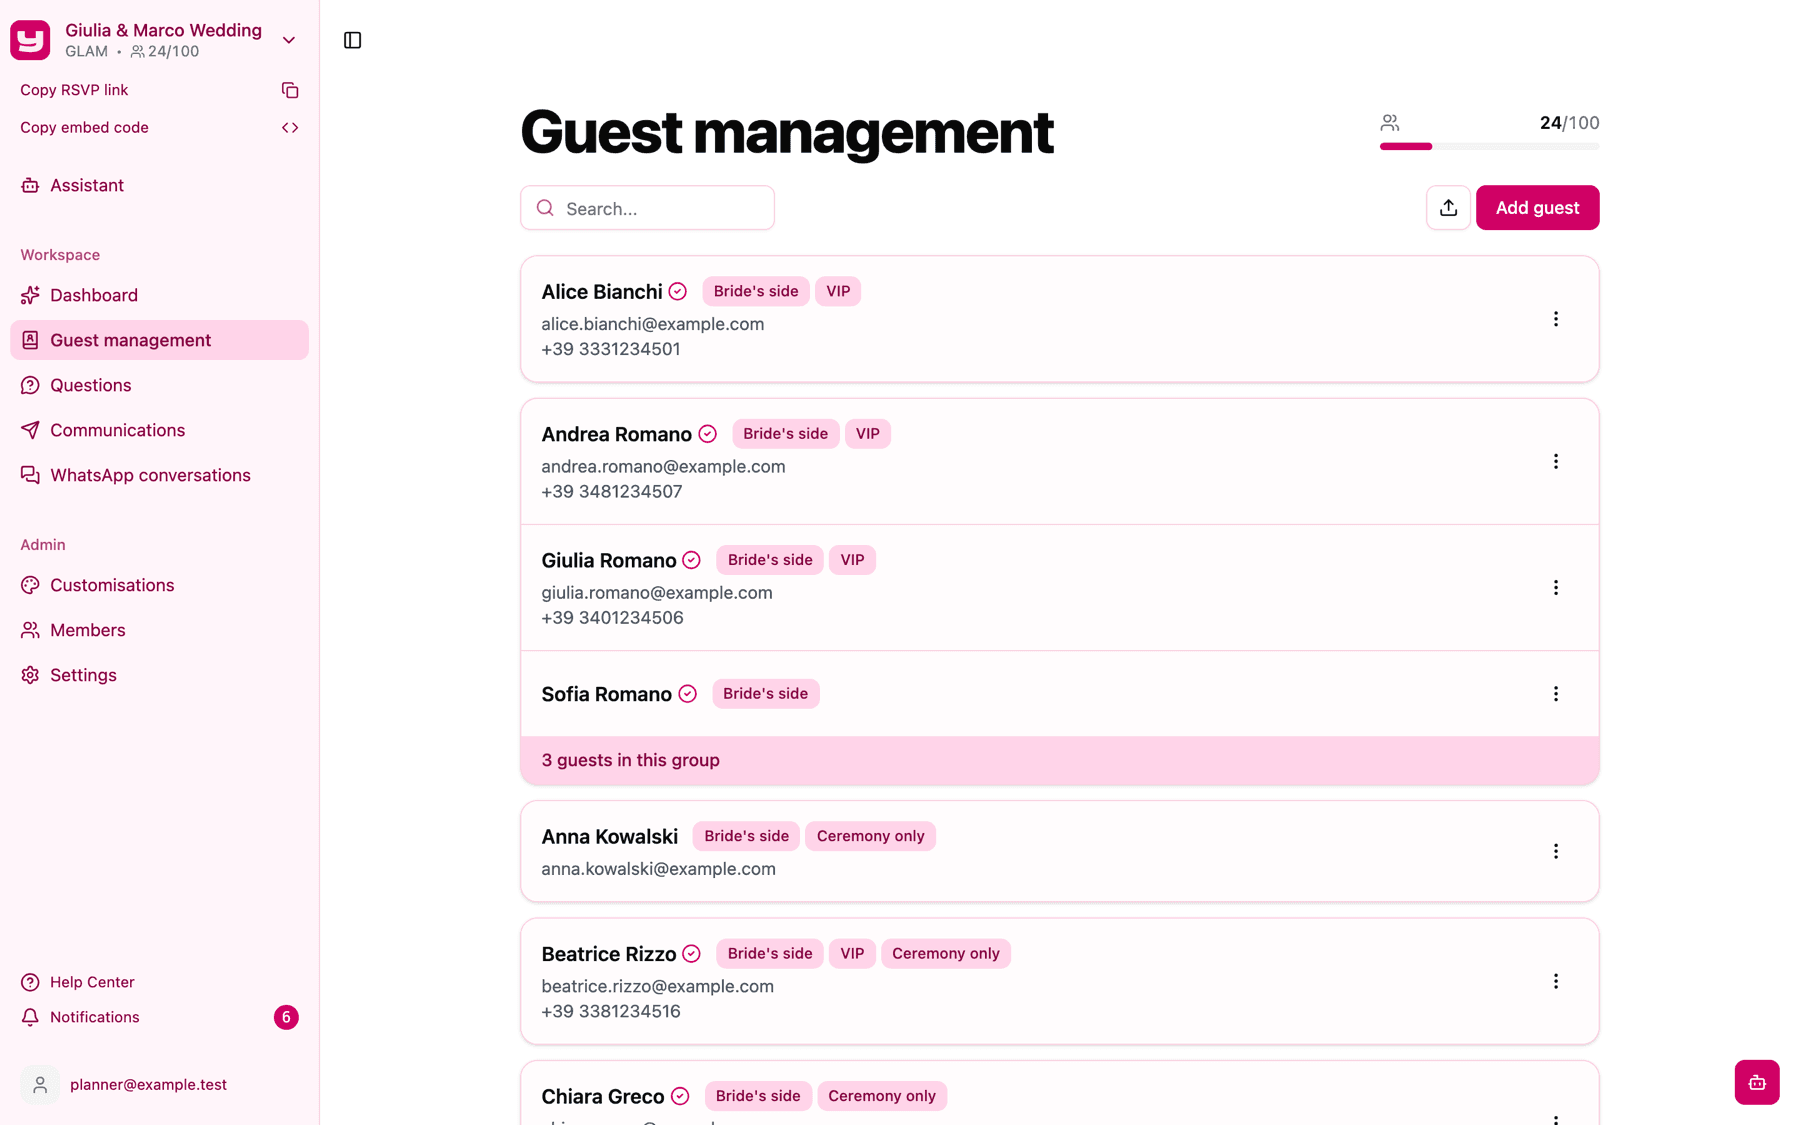
Each guest in Guest management has a row showing:
- the name, followed by
+1,+2and so on when the guest can bring companions; - a check mark when the guest has already answered the RSVP;
- their tags, as small badges;
- their email and WhatsApp number, when you have them. A small warning icon next to the number means the guest has asked not to receive further WhatsApp messages;
- the ⋮ menu on the right, with all the actions for that guest.
Guests who belong to the same household are shown together in one card, with a note such as "3 guests in this group" at the bottom.
Add a guest
Click Add guest at the top of the list (or Add a guest if your list is still empty). The Add a guest window has two steps.
Step 1: Guest details
Fill in the guest's details:
- First name: the only mandatory field.
- Last name: not mandatory in the form, but fill it in. Guests sign in to the RSVP by typing their first and last name, so a guest without a last name can't find themselves.
- Email: must be a valid address, otherwise you'll see "The email format is not valid".
- WhatsApp: choose the country from the flag menu and type the mobile number. If the number isn't valid for that country, you'll see "The number format is not valid".
- Language: Italian, English or French. It's set to your project's language, so you only need to change it for guests who speak another language.
- Tags: pick existing tags or create new ones by typing (see Using tags to organise your guests).
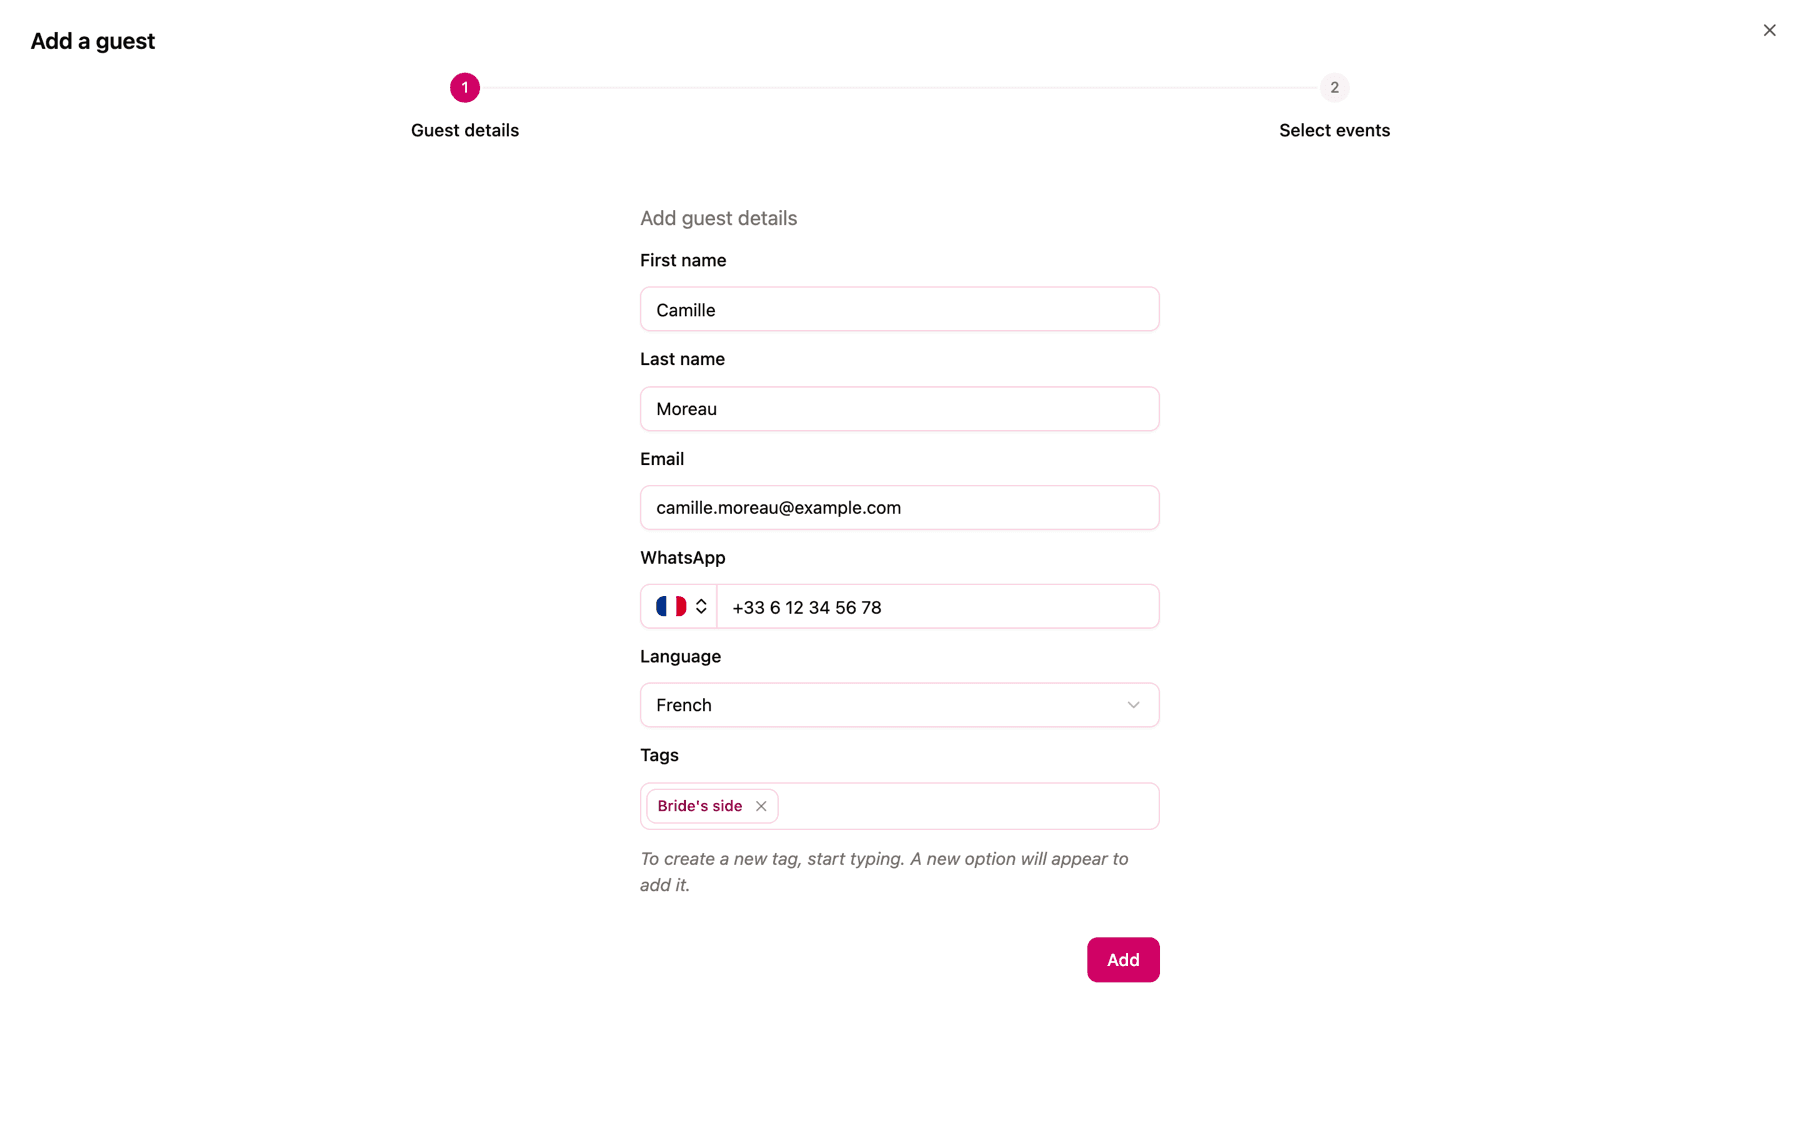
Click Add. The guest is saved straight away and you'll see "The guest was successfully added".
Step 2: Select events
Now choose which RSVP sections the guest should see. Each section of your RSVP is listed with its date, if it has one. Click Add next to each section the guest is invited to: the button changes to Added. When you're done, click End.
If you haven't created any sections yet, you'll read "Create an RSVP section before assigning this guest." That's fine: click End and assign the guest later. Keep in mind that the guest is already saved after step 1, so closing the window at this point doesn't cancel anything. More on sections in Assigning guests to sections.
Why email and WhatsApp matter
Neither is mandatory, but they're how you reach your guests:
- Email communications can only be sent to guests who have an email address, and WhatsApp communications only to guests who have a WhatsApp number. See Sending communications by email and Sending communications on WhatsApp.
- If your RSVP has an Email or Phone number question, the guest finds it already filled in with what you entered here.
Guests don't use their email or phone number to sign in to the RSVP: they type their first and last name. Capital letters, accents and apostrophes don't matter, but the name must match the one in your list. That's why it's worth double-checking spellings, especially for guests whose names are often written in different ways.
Edit a guest
Open the ⋮ menu next to the guest and choose Edit. The Edit guest window has the same fields as the add form, plus one more:
- Plus one: how many companions this guest can add themselves on the RSVP page. For example, set it to 1 for "Marco and a guest". This field isn't in the Add a guest form: you can set it only here, when editing, or with the Plus one column when importing from CSV.
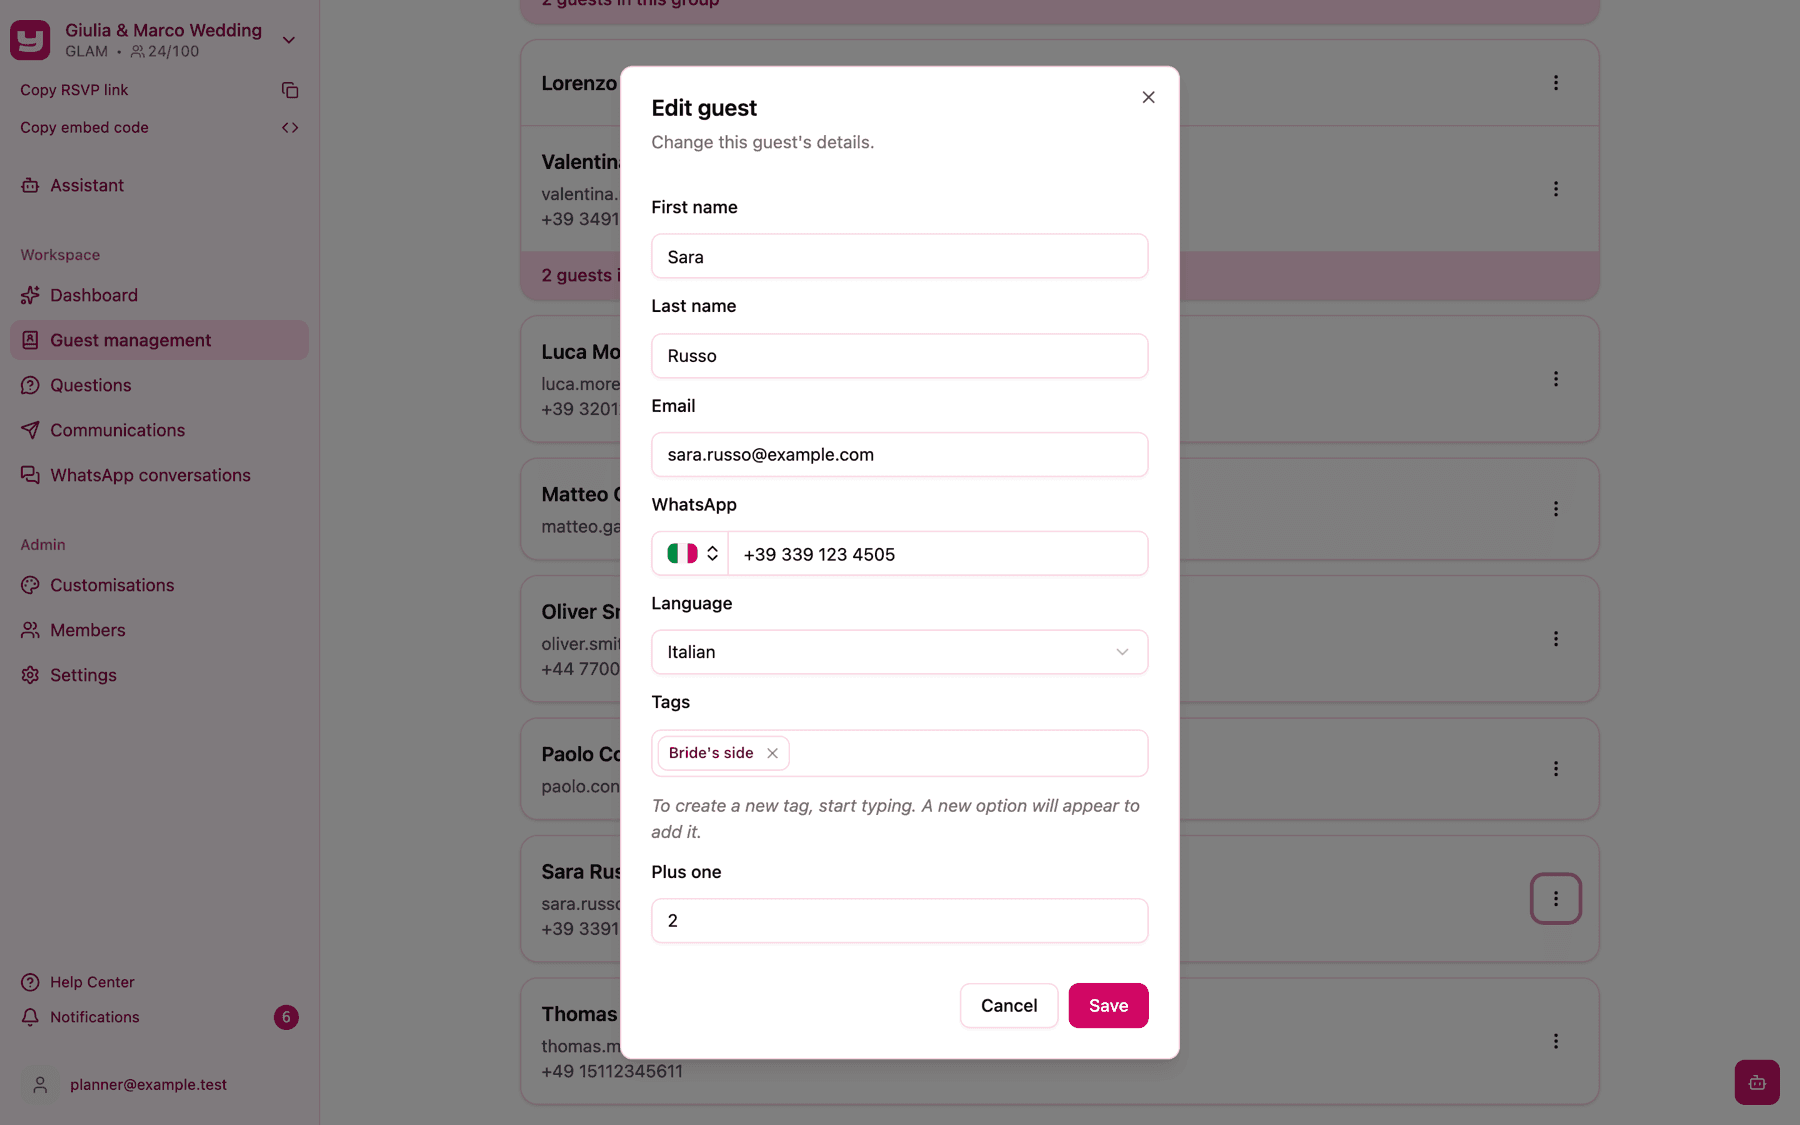
Click Save and you'll see "The guest was successfully edited." How plus-ones work once the guest adds them is explained in Households and plus-ones.
Tip: if you change a guest's first or last name, the guest will need to type the new name to sign in to the RSVP. Their answers are kept.
Find a guest
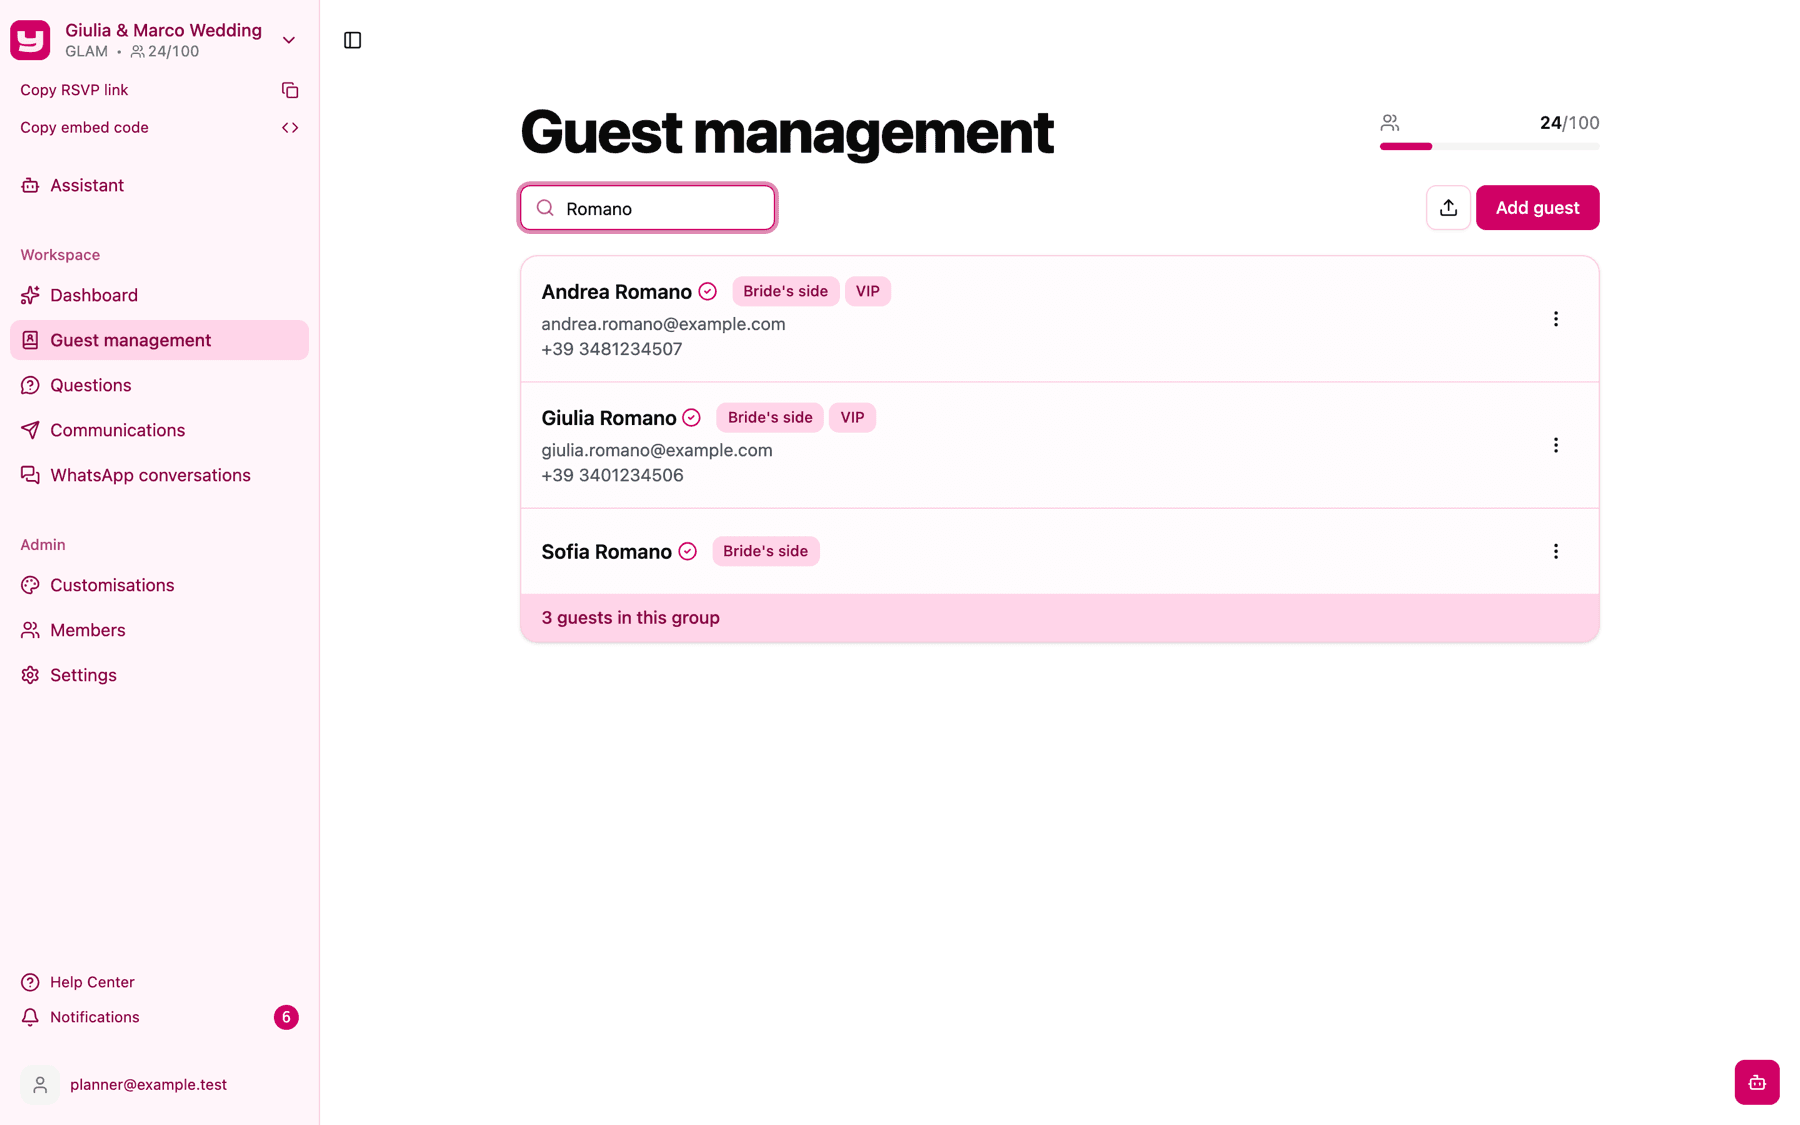
Type in the Search... box at the top of the list. The list updates as you type and matches the first name, last name, email and WhatsApp number, even partially and regardless of capital letters. So "ross" finds every Rossi, and part of an email address or phone number finds that guest.
When a guest who belongs to a household matches, the whole household card is shown, so you can see them in context. The search doesn't look at tags: to work with guests by tag, see Using tags to organise your guests.
The guest menu
The ⋮ menu next to each guest gives you:
| Action | What it does |
|---|---|
| Edit | Changes the guest's details, as described above. |
| Manage events | Opens the list of your RSVP sections, where you tick or untick the ones this guest is invited to. See Assigning guests to sections. |
| Add to a group / Remove from group | Puts the guest in a household with other guests, or takes them out of it. See Households and plus-ones. |
| Chat | Opens the WhatsApp conversation with the guest. It appears only for guests with a WhatsApp number. See WhatsApp conversations. |
| Delete | Removes the guest from the project, as described below. |
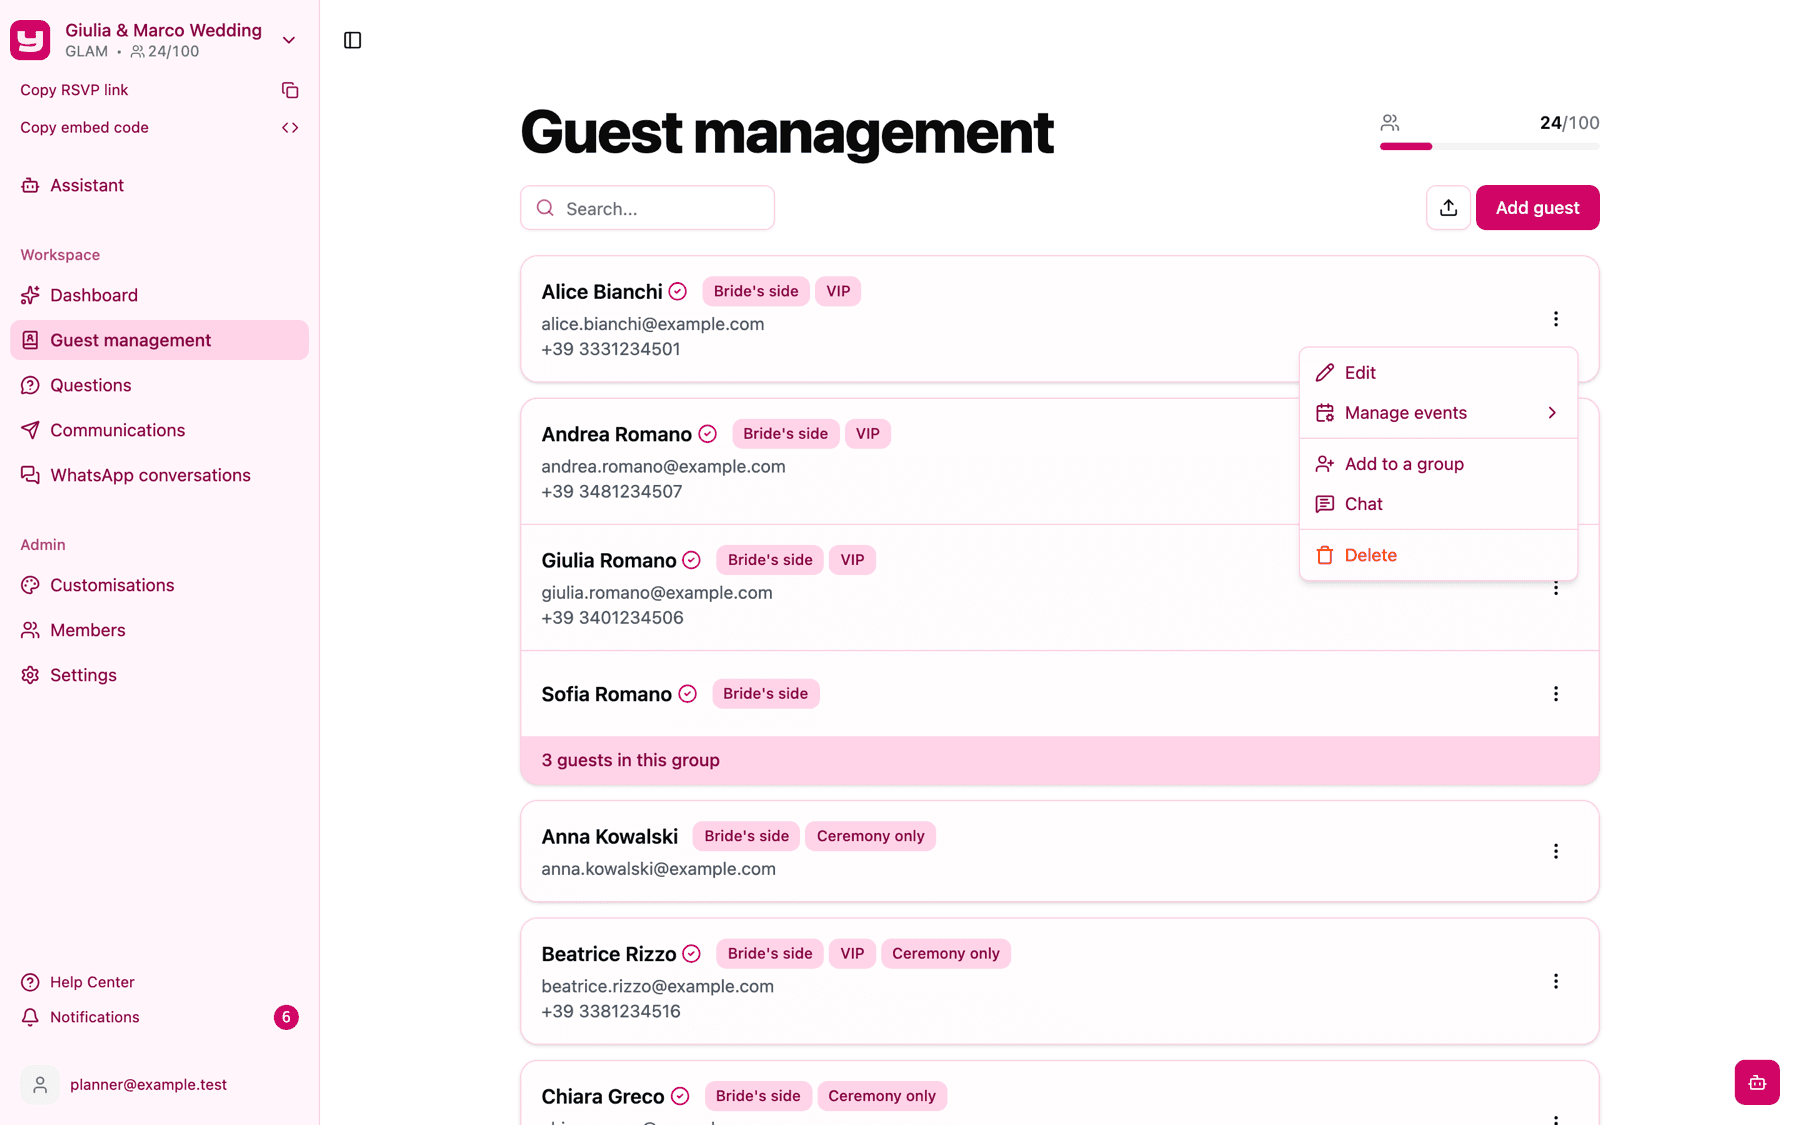
Delete a guest
Open the ⋮ menu and choose Delete. Invytly asks Are you sure to remove this guest? and reminds you that their answers will be lost. Click Next to confirm, or Cancel to keep the guest.
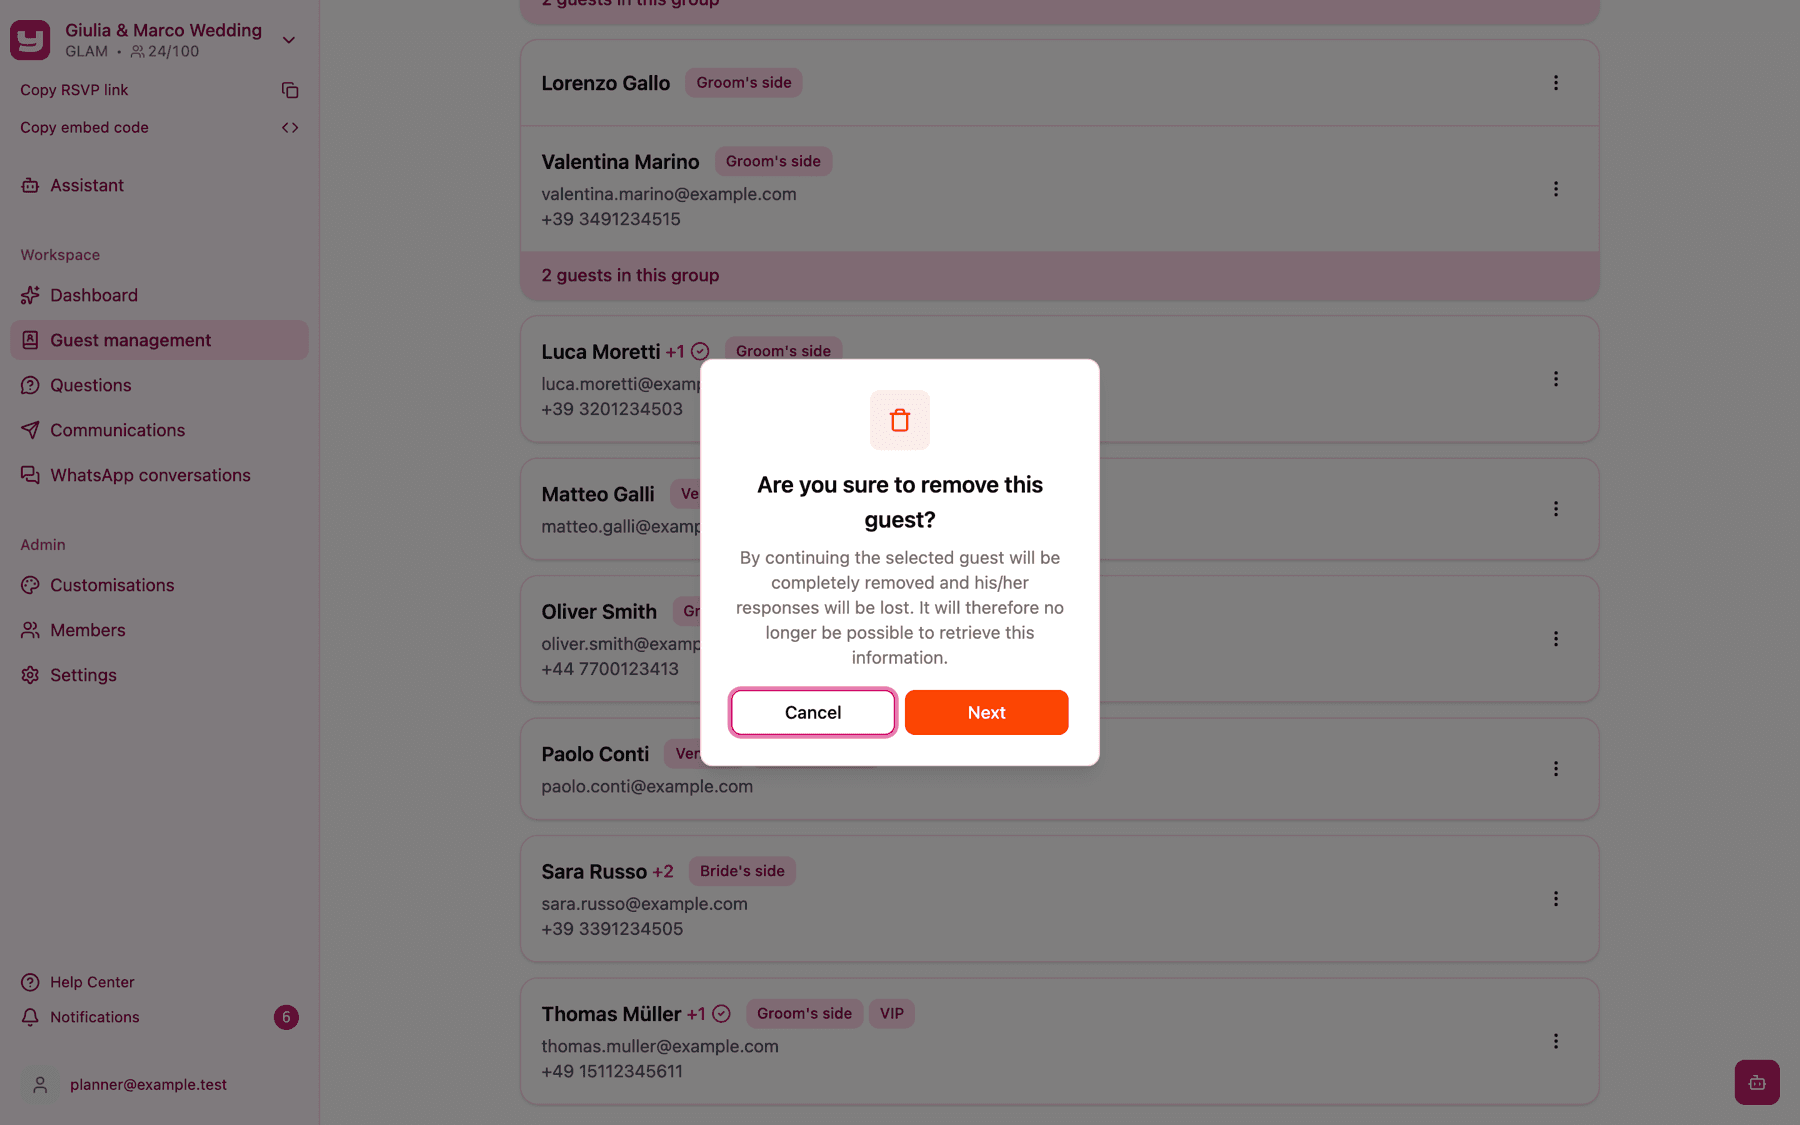
Deleting a guest removes:
- the guest from your list and from every RSVP section;
- all their answers;
- any documents they uploaded in the RSVP, such as ID documents;
- their place in a household. If only one person is left in that household, they go back to being a guest on their own.
This can't be undone, so if you might need the answers later, download them first. On the bright side, every deleted guest frees up a place in your guest limit straight away.
The guest limit
At the top right of Guest management you'll see a counter such as 48/100 with a progress bar: how many guests you have and how many your project allows. The bar turns amber when you're close to the limit and red when it's full.
When the limit is reached, Add guest is disabled and a red banner explains that you can't add more guests. You can still edit and delete existing guests. To find out how to free up places or get more, see What to do when you need more guests.